A Survey is a type of activity that you can add to your study in Avicenna and is the most common activity participants complete in research studies. Surveys share all core features of Avicenna activities, including triggering logics, notification templates, and criteria.
If you have not already reviewed these features, we recommend doing so before continuing. This section focuses on features that are specific to surveys.
Survey Structure
A survey is made of two main building blocks: Regular Sections (for asking questions) and End Sections (for showing messages after they finish).
Each regular survey section contains one or more questions. Sections are used to group related questions or to apply branching or loop iterations. Questions are the core elements of a survey and are presented to participants to collect their responses.
Creating a Survey
In Avicenna, surveys can be created in two different ways, depending on your workflow and level of technical familiarity.
1. Survey Editor
You can create a survey using Avicenna Research’s Survey Editor, an interface that allows you to define sections, questions, branching logic, and other settings without writing any code. This method is recommended for most users and provides built-in validation as you design the survey.
To learn more about creating a survey from scratch, see Accessing Activities.
2. Survey Definition File
Surveys in Avicenna can also be created by uploading a Survey Definition File, which is a plain-text JSON document.
The survey definition file should describe the complete configuration of a survey, including:
- When the survey should be prompted (via Triggering Logics)
- How participants are notified (using Notification Templates)
- What enables or disables the survey (through criteria)
- The sections defined in the survey and the questions within each section
- Branching rules and skip patterns
- Any other survey-specific settings supported by Avicenna
Survey Schema
All survey definition files must conform to a predefined schema called the Avicenna Survey Schema. This schema ensures that surveys are structured correctly and can be interpreted reliably by the system.
Survey Definition File Validation
When a survey definition file is uploaded, Avicenna automatically validates it against the survey schema before accepting it. If the file does not meet the schema requirements, the survey will not be created until the issues are resolved.
Avicenna does not provide detailed error reporting for survey definition file validation. So if you try to upload a survey definition file that is invalid, you will just see an error saying the file is not valid, but no more details on what the issue is in the file.
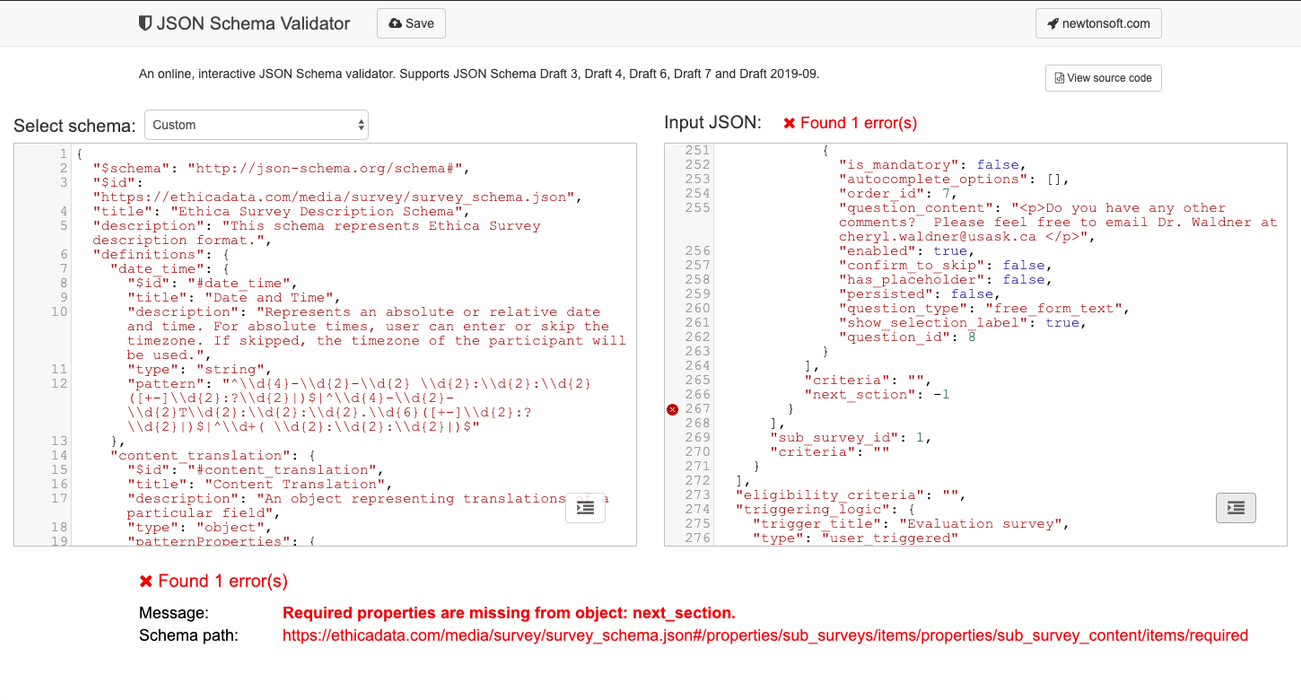
To get more information on exactly what the problem is with the file, you can use external JSON schema validators such as JSON Schema Validator. On this site, paste the Avicenna Survey Schema into the left panel and your Survey Definition File into the right panel. The validator will then highlight any errors or schema violations in the file.
Importing a New Survey
To create a survey from a survey definition file, you can upload the file to the Avicenna website. To do so:
-
Open the Avicenna Researcher Dashboard and navigate to the Activities page.
-
Click on Create New Activity.
-
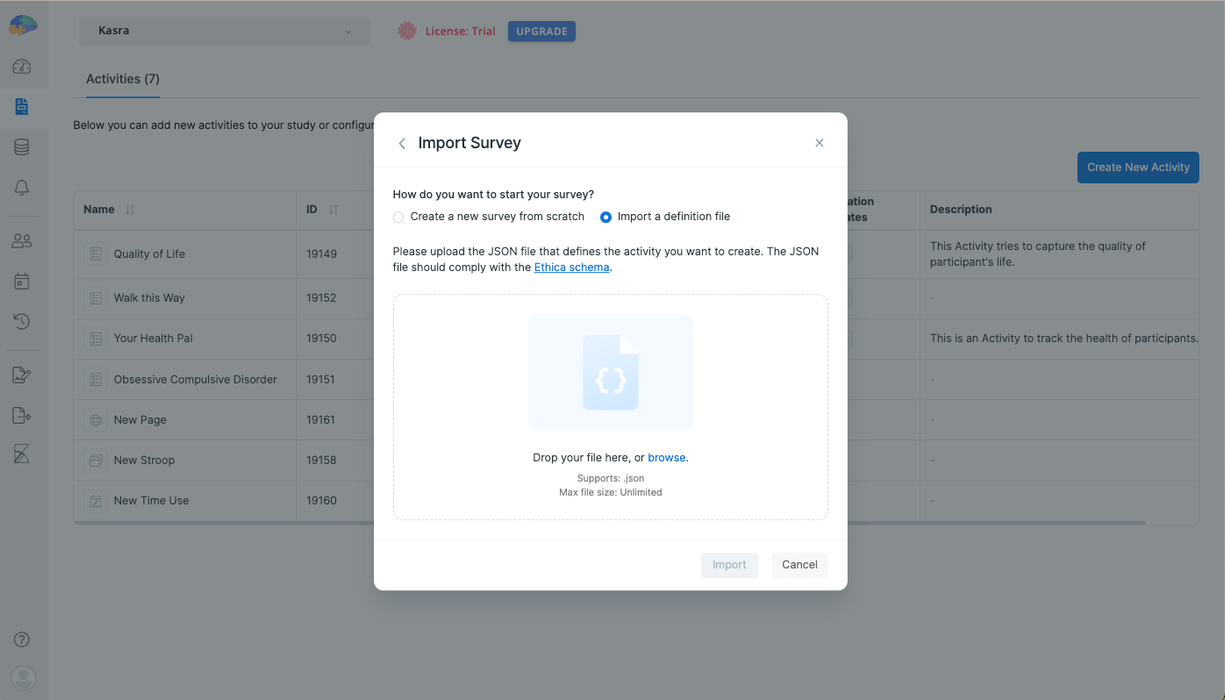
Select the Survey and then Import a definition file.
-
Drop your file into the upload area, or select it from your computer. This will begin validating the file.
-
If your file is validated, click on Import to create your survey.
-
If the file is not valid, you will see an error. You can refer to Survey Definition File Validation for guidance on validating your file.
Importing Survey Definition File into an Existing Survey
You can also import a survey definition file into your existing survey. To do so:
-
Open the Survey Activity Editor for the survey you want to update.
-
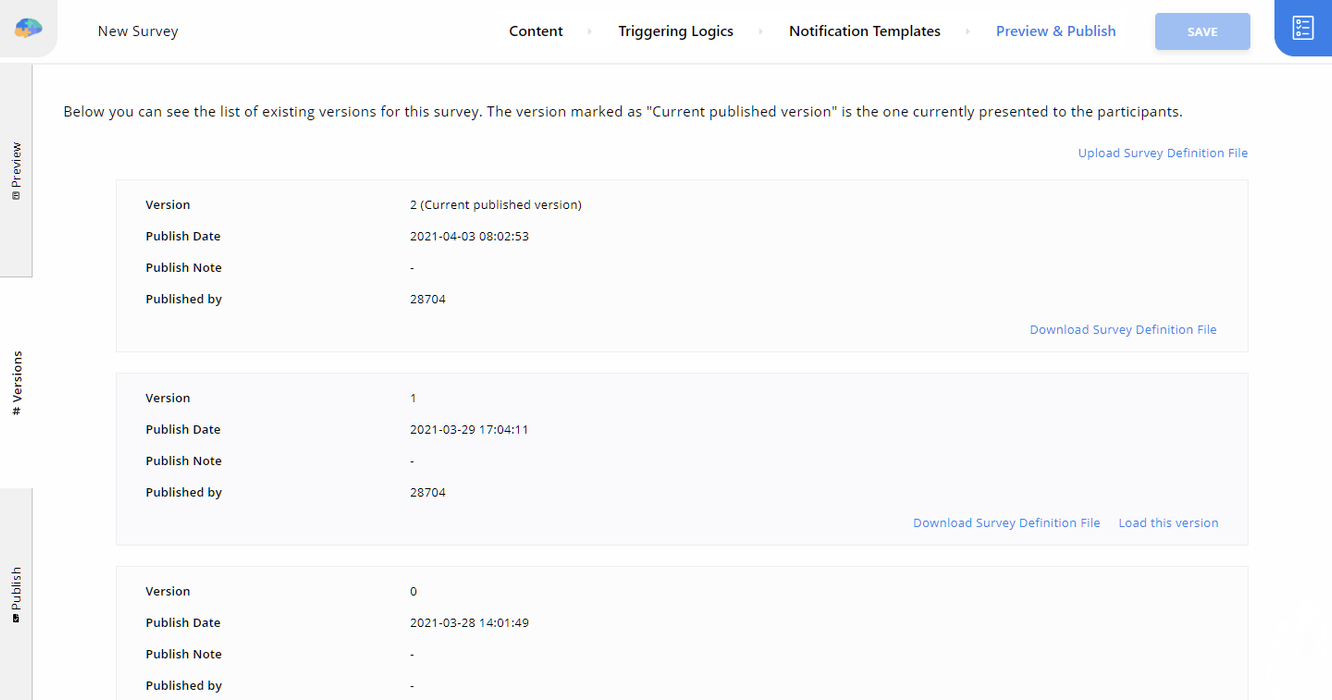
Go to Preview & Publish, then Versions.
-
There, you will see the list of versions for your current survey.
-
At the top of the versions list, click on Upload Survey Definition File.
-
In the Import dialog, upload a valid survey definition file.
-
Once the upload is complete, the content of the file will be loaded into your survey as a draft. You can preview and then publish this survey.
Preview Survey
Before publishing your survey, it is important to review it carefully to ensure everything works as expected. The Preview tab on the Preview & Publish page allows you to simulate the full survey experience before it becomes available to participants.
The Preview page is divided into two main areas:
Survey Preview
The right side of the page displays a live preview of the survey. This preview closely simulates how the survey will appear and behave in the Avicenna mobile and web apps. From the top of the preview, you can switch between Desktop and Mobile views to see how the survey looks on different screen sizes.
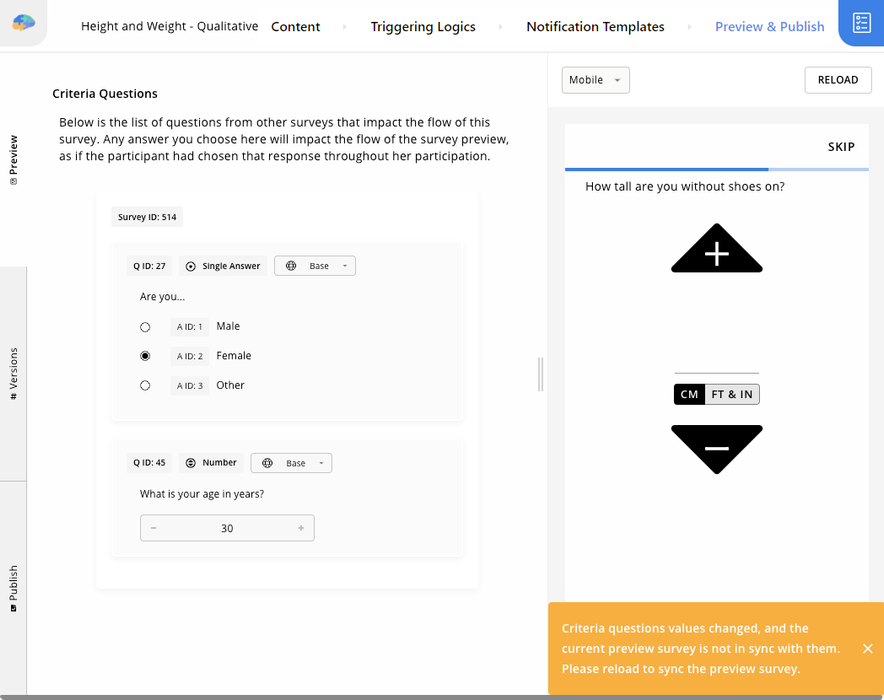
Criteria Dependencies
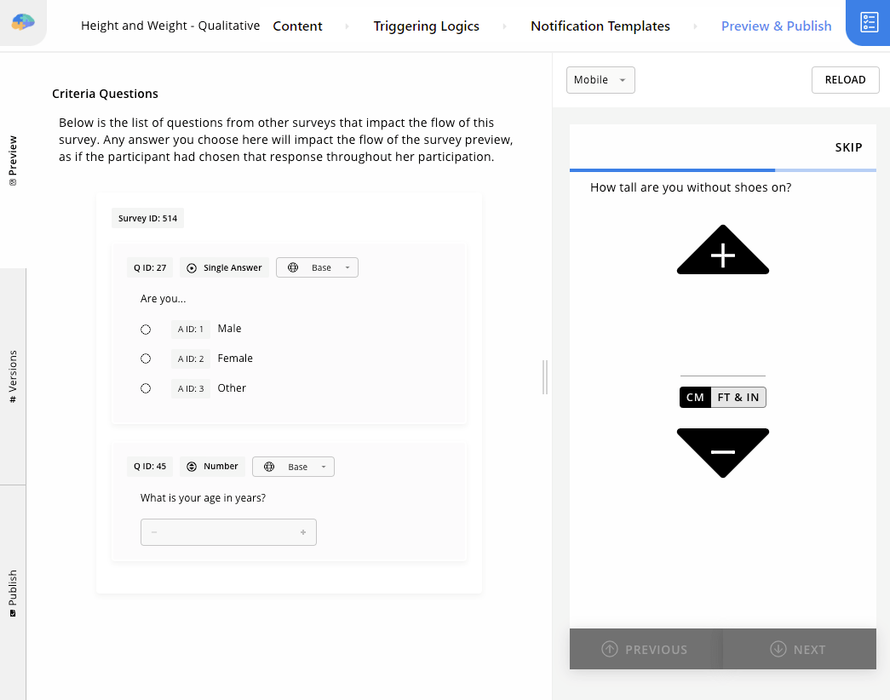
The left side of the page lists questions from other surveys that affect the flow of the current survey through the criteria. As we explained in the criteria section, Avicenna allows survey sections and questions to depend on responses collected in other surveys.
The preview tab detects such dependencies and displays the relevant questions on the left side. By answering them, you can simulate different participant states and observe how the survey flow changes under various conditions.
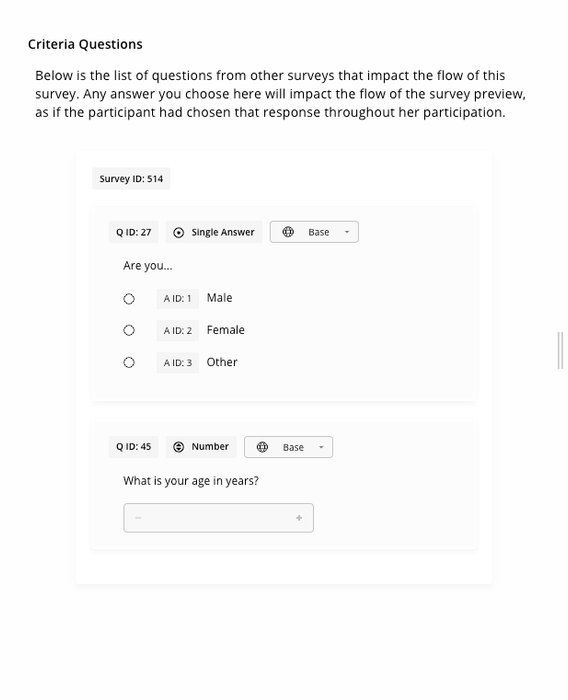
[!example]
Consider the previous image. Assume the survey asks participants about their weight and height, and if they are female and between 18 and 40 years old, it also asks if they are pregnant.In this case, the flow of the survey depends on the participant’s gender and age, which are collected in another survey. As a result, the preview tab lists two dependency questions on the left side: one asking for the participant’s gender and another asking for their age.
By default, these questions have no answers, so the survey flow behaves as if the participant skipped them. After answering one or more of these dependency questions, Avicenna prompts you to reload the survey to apply the changes.
You can reload the preview by clicking the dialog or by selecting the Reload button in the top-right corner of the preview panel.
Publish Surveys
Any changes you make to the survey will be saved in Draft mode. While in draft mode, these changes are not visible to participants, including both test and main participants, and can be reverted if needed. To make your changes available to participants, you must publish the survey.
You can publish a survey from the Publish tab on the survey editor’s Preview & Publish page:
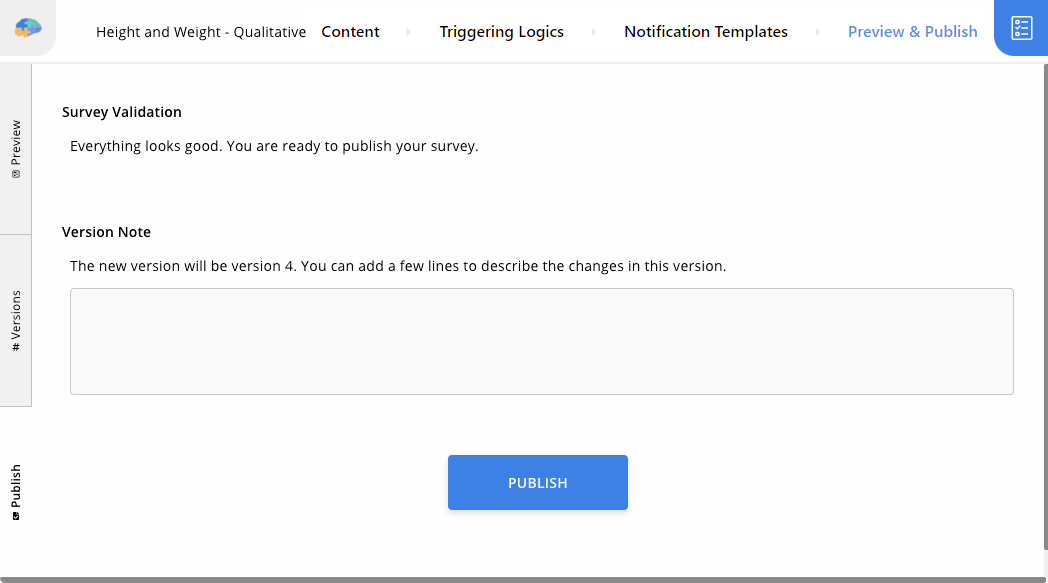
Survey Validation
This section first runs validation on your survey to ensure all settings are configured correctly. Any errors or warnings are displayed in the Survey Validation section.
All validation errors must be resolved before you can proceed with publishing the survey. Warnings do not block publishing, but should be reviewed carefully.
Version Note
Once all validation issues are resolved, or if there are no errors or warnings, you can publish the survey by clicking the Publish button. When publishing, you can optionally add a version note describing the changes included in this release.
Version notes are stored with the published survey and can be reviewed later in the Versions tab to help track changes over time.
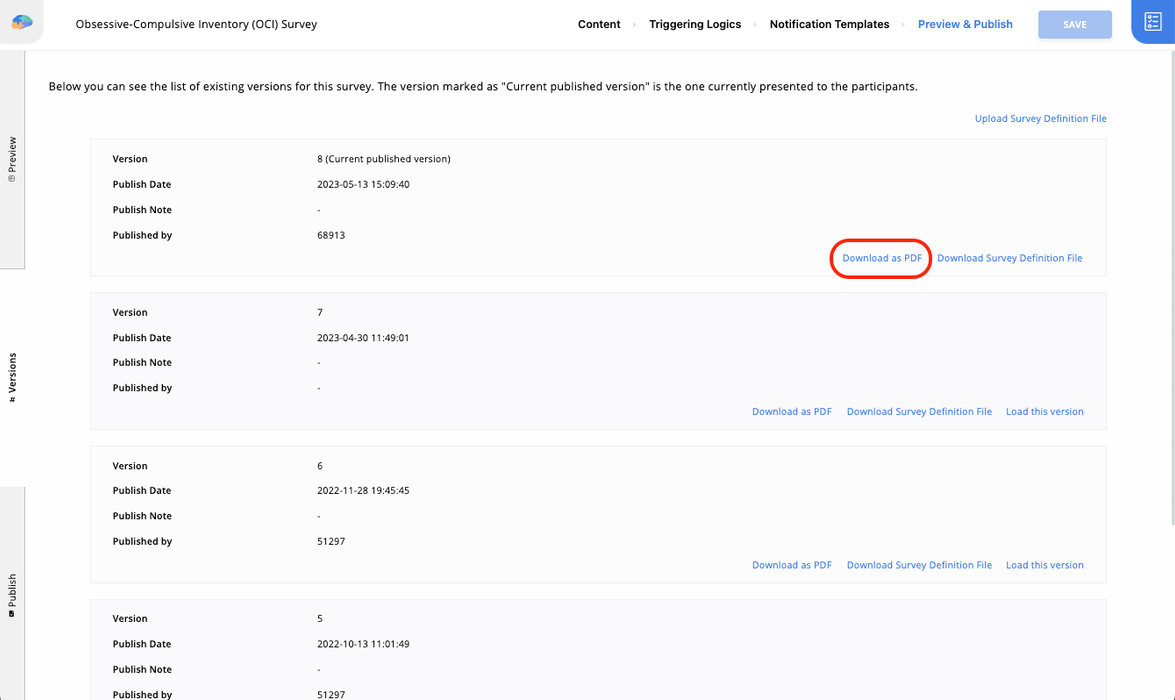
Versions and Export
Each time you publish a survey, Avicenna creates a new version. All versions are listed in the Versions tab, along with metadata such as publish date, publisher, and version notes.
For each version, you can:
- Download as PDF to export the contents of that version
- Download Survey Definition File to export the content of that version
- Load this version to create a new version of your Survey with the content of the version you selected and set it in draft mode.
The Load this version option is not available for the most recently published version.
If a draft version exists, a Discard button is available. This allows you to discard the draft and revert to the last published version.
Export Your Survey as a PDF
Avicenna allows you to export your surveys in PDF format. Here are a few common use cases for this feature:
- IRB Submissions: For example, when submitting your study protocol for ethical approval, Institutional Review Boards (IRBs) often require a document showing exactly what questions participants will see. This export provides a single, organized file containing all translations to facilitate this review process.
- Offline Archiving: Create a permanent record of your survey protocols for your research files.
- Content Review: Print hard copies to review question flow and translations with your team offline.
Here is how you can do this:
-
In your survey editor, go to the Preview & Publish page.
-
If you have already published your survey, go to the Versions tab. If not, you need to publish your survey first.
-
On this page, you can see the list of your survey versions. They are sorted based on the Version number. To export a copy of your survey in PDF, select the Download as PDF button from the version that you want.
The generated PDF file includes the name of the survey and the content for all configured languages in your study. To ensure clear organization:
- Separated Localizations: Each localization starts on a new page, with a header clearly indicating the language (e.g., English, Dutch).
- Detailed Content: For choice-based questions (such as Single or Multiple Answer), all potential answer options are explicitly listed under the question content.
[!note]
If the answer options for Single or Multiple Answer questions are images, they will not be displayed in the generated PDF.
Additional Settings
Each survey offers a set of additional settings. You can access these settings by opening the Survey Editor, navigating to the Content page, and opening the Settings tab in the lower right corner. Below, we describe each of these configurations.
Criteria
This specifies the criteria for the survey activity. This acts as the main criteria for the activity and supersedes the criteria set on the triggering logics. You can learn more about activity and triggering logic criteria in the criteria section.
Section Randomization
You can randomize the selection of sections within your survey using the options available in Section Randomization. This feature allows you to choose a subset of sections using the Included Section ID(s) option and specify a Selection Count. With this configuration, in addition to the sections that are not part of the Included Section ID(s), only a subset of the specified sections will be used to construct the survey. The size of this subset is equal to the Selection Count.
[!example]
For example, consider a survey with seven sections. Assume the
Included Section ID(s)option is set to sections 3, 4, and 5, and theSelection Countis set to 2. In this case, sections 1, 2, 6, and 7 are always included in the survey. From sections 3, 4, and 5, only two sections are randomly selected and used to construct the survey.As a result, the sections shown to a participant could be any of the following:
- 1, 2, 3, 5, 6, 7
- 1, 2, 4, 5, 6, 7
- 1, 2, 3, 4, 6, 7
Similarly, you can enable the Random Section Order option to randomize the order of all sections in the survey.
[!example]
For example, consider a survey with five sections. When the
Random Section Orderoption is enabled, Avicenna presents all sections, but randomizes their order for each participant.For example, participants may see the sections in order, such as:
- 3–1–5–2–4
- 2–4–1–3–5
Although the order changes, all sections are still included in the survey.
[!note]
Section selection and ordering randomization occur only once per survey session. Once a participant opens a survey session, the selected sections and their order remain fixed for the duration of that session.
Capture Location
By default, this option is disabled.
The Capture Location option allows Avicenna to record a participant’s geographic location while they are answering a survey. When this option is enabled, each survey response is geo-tagged at the time it is submitted.
This option is different from using a Location Data Source in your study. A Location data source continuously captures a participant’s location, regardless of whether they are interacting with a survey. This location data is stored separately from survey responses. While it is possible to join the data at a later stage to infer the participant’s location at the time of answering a survey, Avicenna does not perform this automatically.
On the other hand, enabling Capture Location ensures that survey responses themselves are geo-tagged, even if no Location data source is configured. This applies as long as the participant grants location permission and GPS is available and enabled on their device.
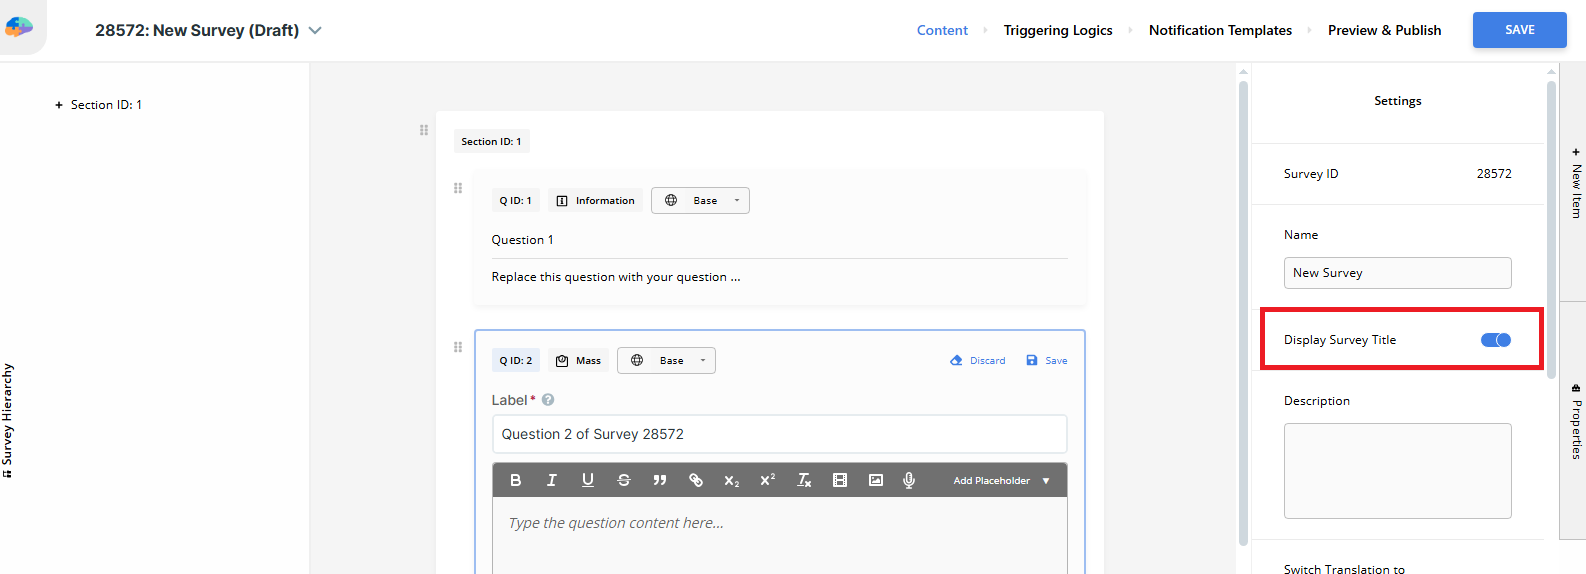
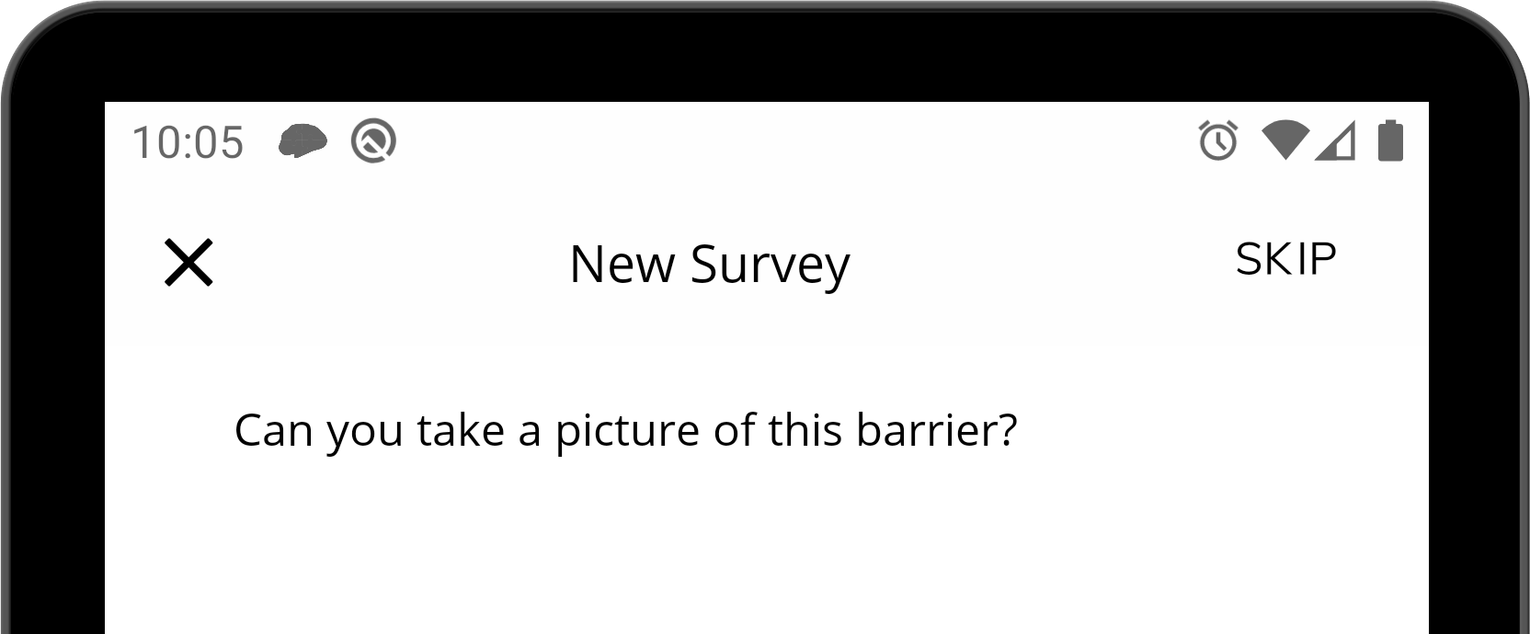
Display Survey Title
By default, this option is disabled.
This setting allows you to display the name of the survey at the top of the participant’s screen. By default, the header is left empty to keep the interface clean. When enabled, the survey title will be visible on all pages of the survey. You can find this toggle in the Settings tab (the rightmost panel) of the Survey Editor.
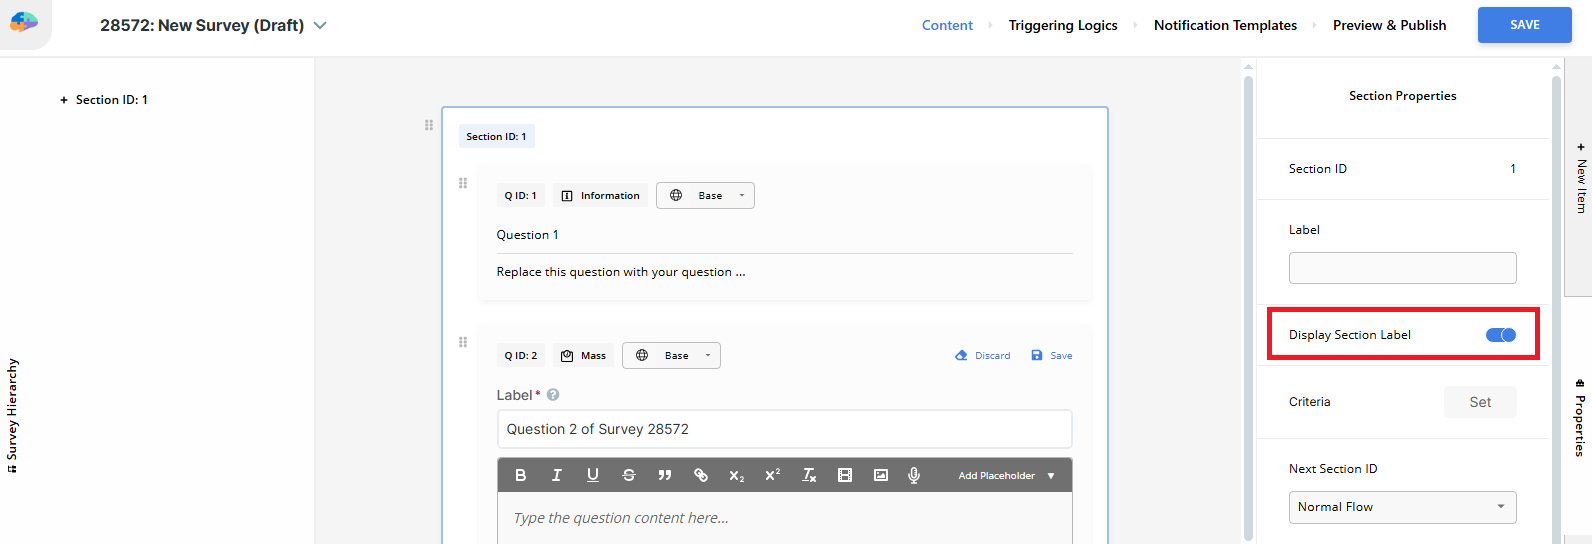
Display Section Label
By default, this option is disabled.
You can configure individual survey sections to display their label (name) at the top of the screen. To access this setting, select a Section in the Survey Editor and open the Properties panel on the right. When enabled, the section label will appear on all pages that display content from that specific section.
[!note] Header Display and Character Limits
If you choose to enable both Display Survey Title and Display Section Label at the same time, they will appear together in the header using the format:Survey Title - Section Label.To ensure the text fits properly on mobile screens, the header supports a maximum of 24 characters:
- If only the Survey Title or only the Section Label is enabled, it will display up to 24 characters.
- If both are enabled, the system will display up to 12 characters from the survey title and 12 characters from the section label. Longer texts will be truncated.
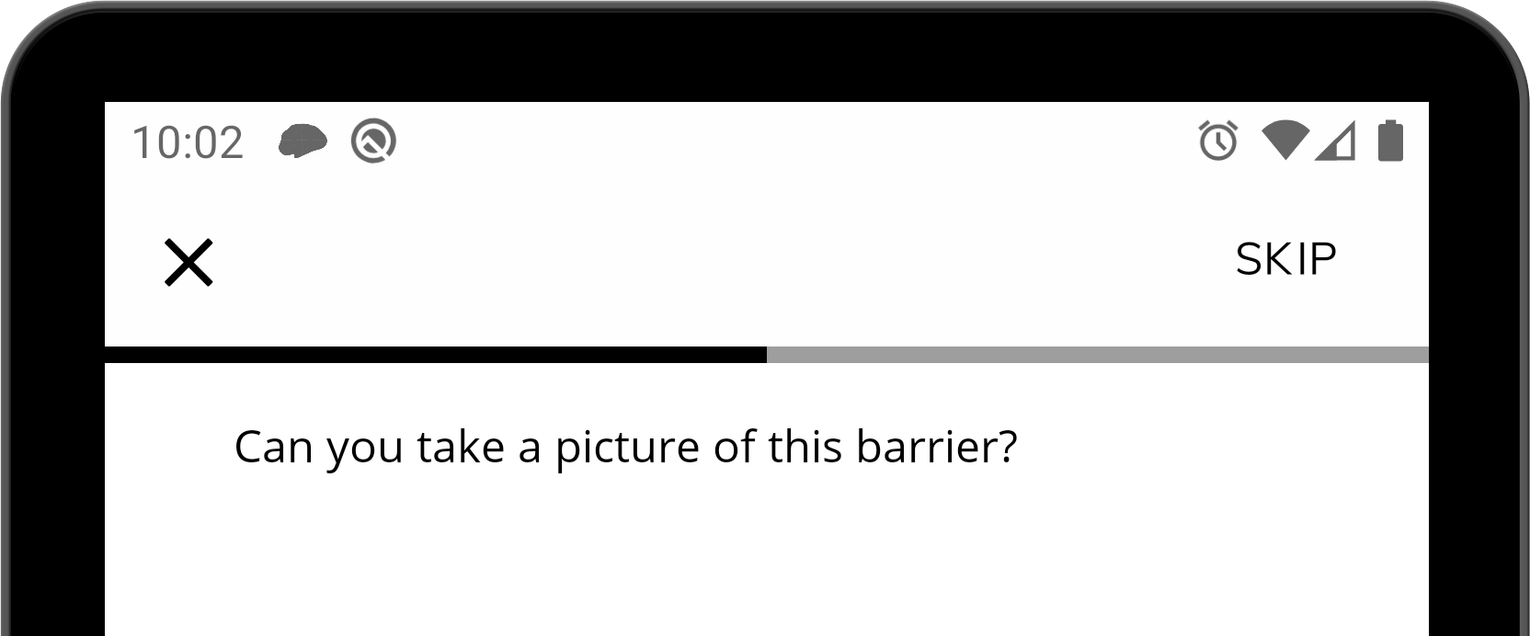
Show Progress
By default, this option is enabled.
This option displays a visual indicator that helps participants understand how much of the survey remains in their current session. The images below show the same survey with the Show Progress option enabled and disabled.
[!note]
The progress indicator is approximate and does not reflect the exact number of remaining questions. Depending on survey logic, such as branching rules, skip patterns, or randomized section selection, some questions or sections may be skipped. When this occurs, participants may notice sudden jumps in the progress indicator.
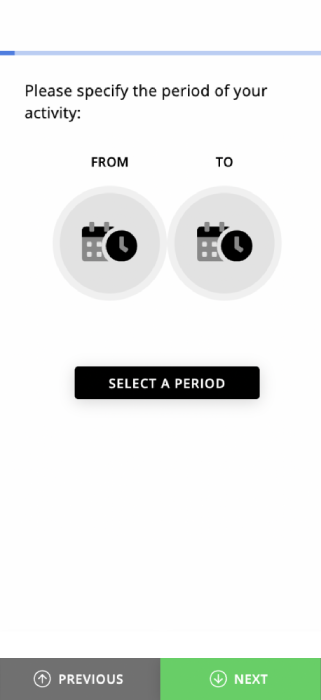
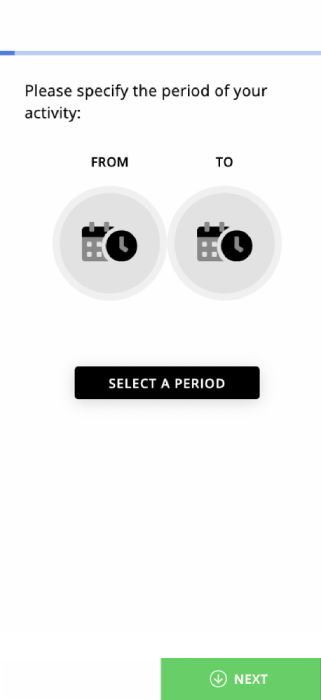
Show Previous Button
By default, this option is enabled.
This setting controls whether participants can navigate back to earlier questions in a survey. When enabled, the Previous button allows participants to review and modify their responses to previous question(s).
The images below show the same survey with the Show Previous Button option enabled and disabled.
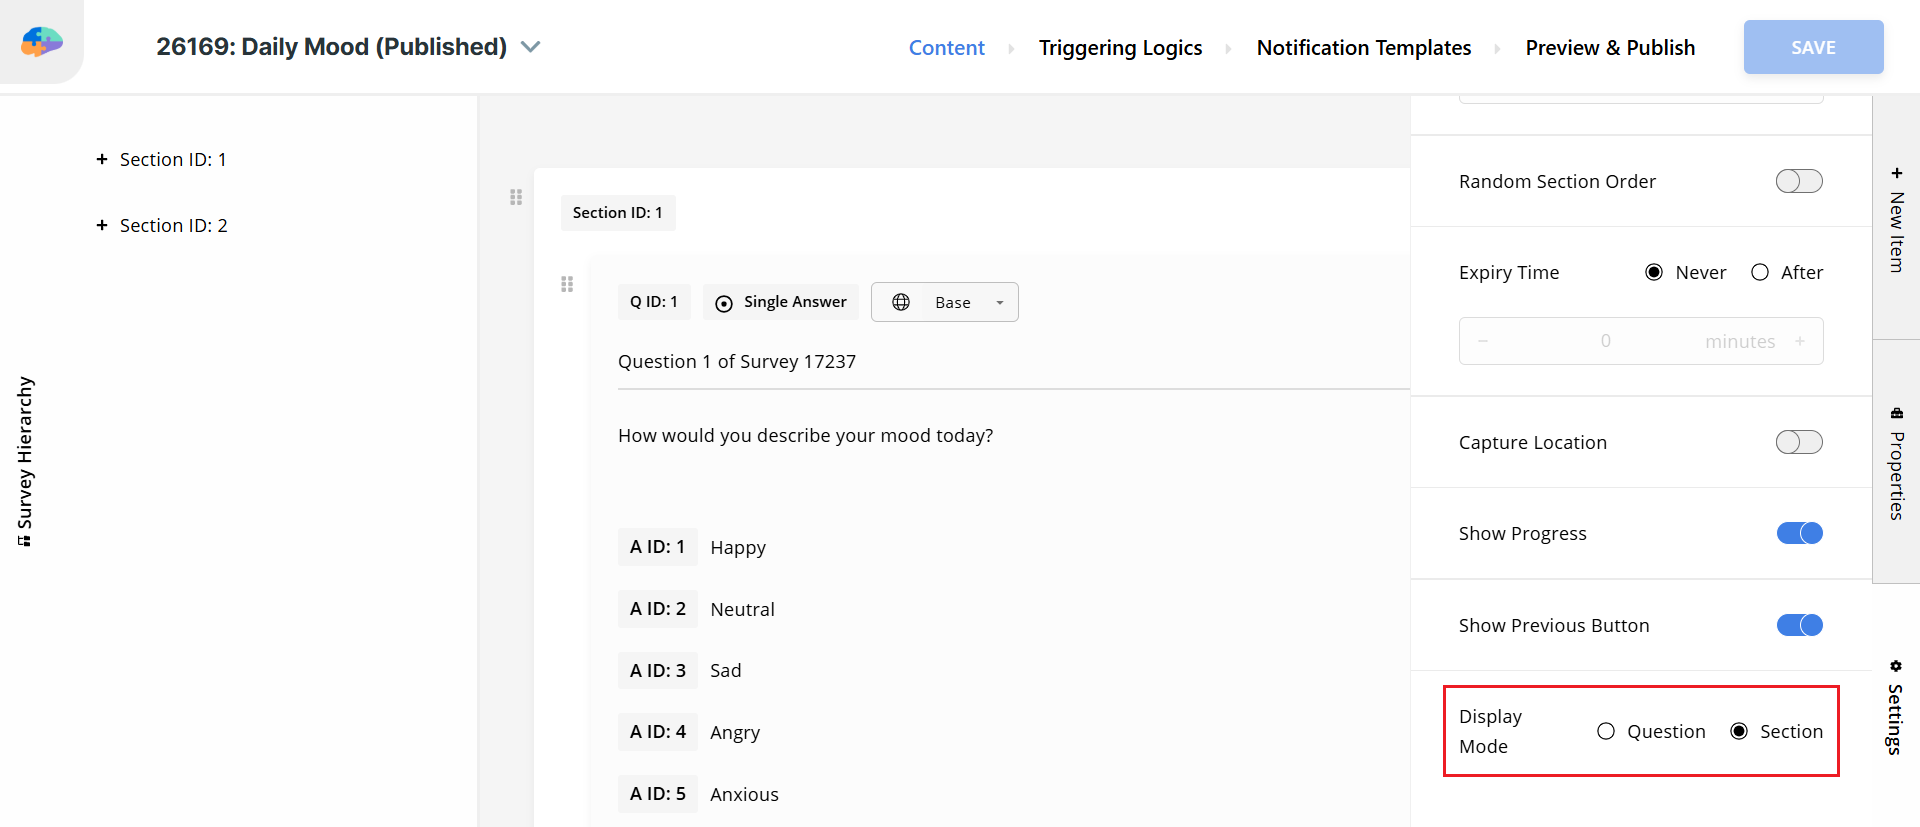
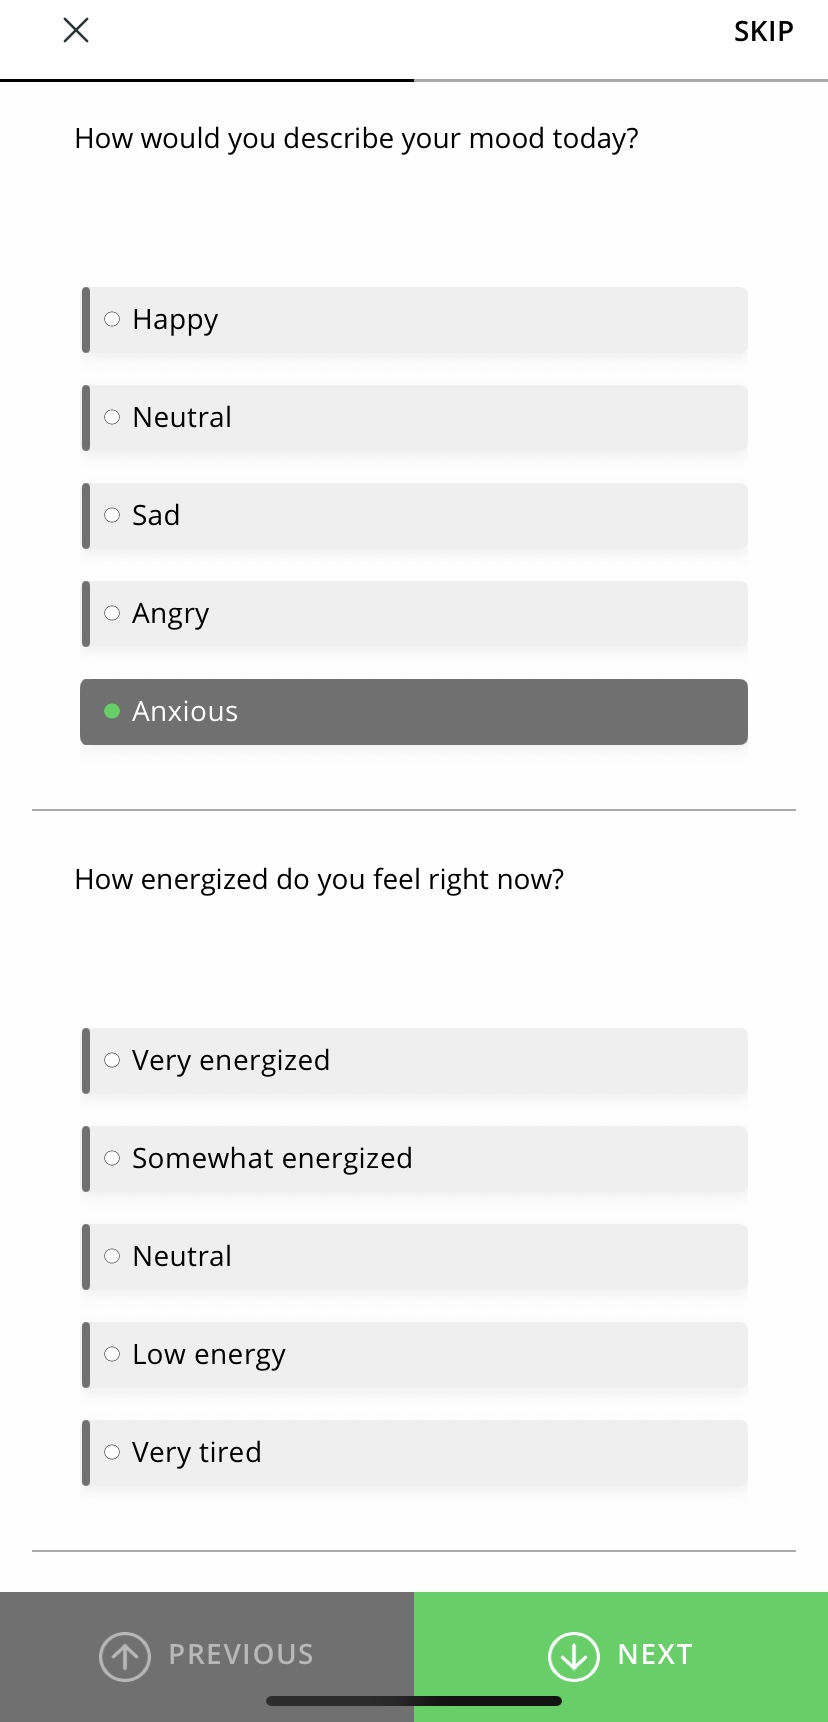
Display Mode
This setting controls how survey questions are presented to participants. You can choose:
- One question per page
- All questions of a section on the same page
By default, the survey shows one question per page. If you choose the Section option, participants see all questions in that section together on a single screen. Use Section Mode when related items should appear together.
In Section mode, Avicenna evaluates logic conditions in real time. Question criteria, placeholders, and sender or receiver dependencies update immediately if a participant changes an answer on the page. If a question becomes enabled, it appears right away. If a question becomes disabled, it disappears immediately, even if it was already answered.
[!note]
Participants navigate pages using the Next and Previous buttons if those buttons are enabled.
Avicenna automatically saves in-progress responses when the participant moves between pages or sections.
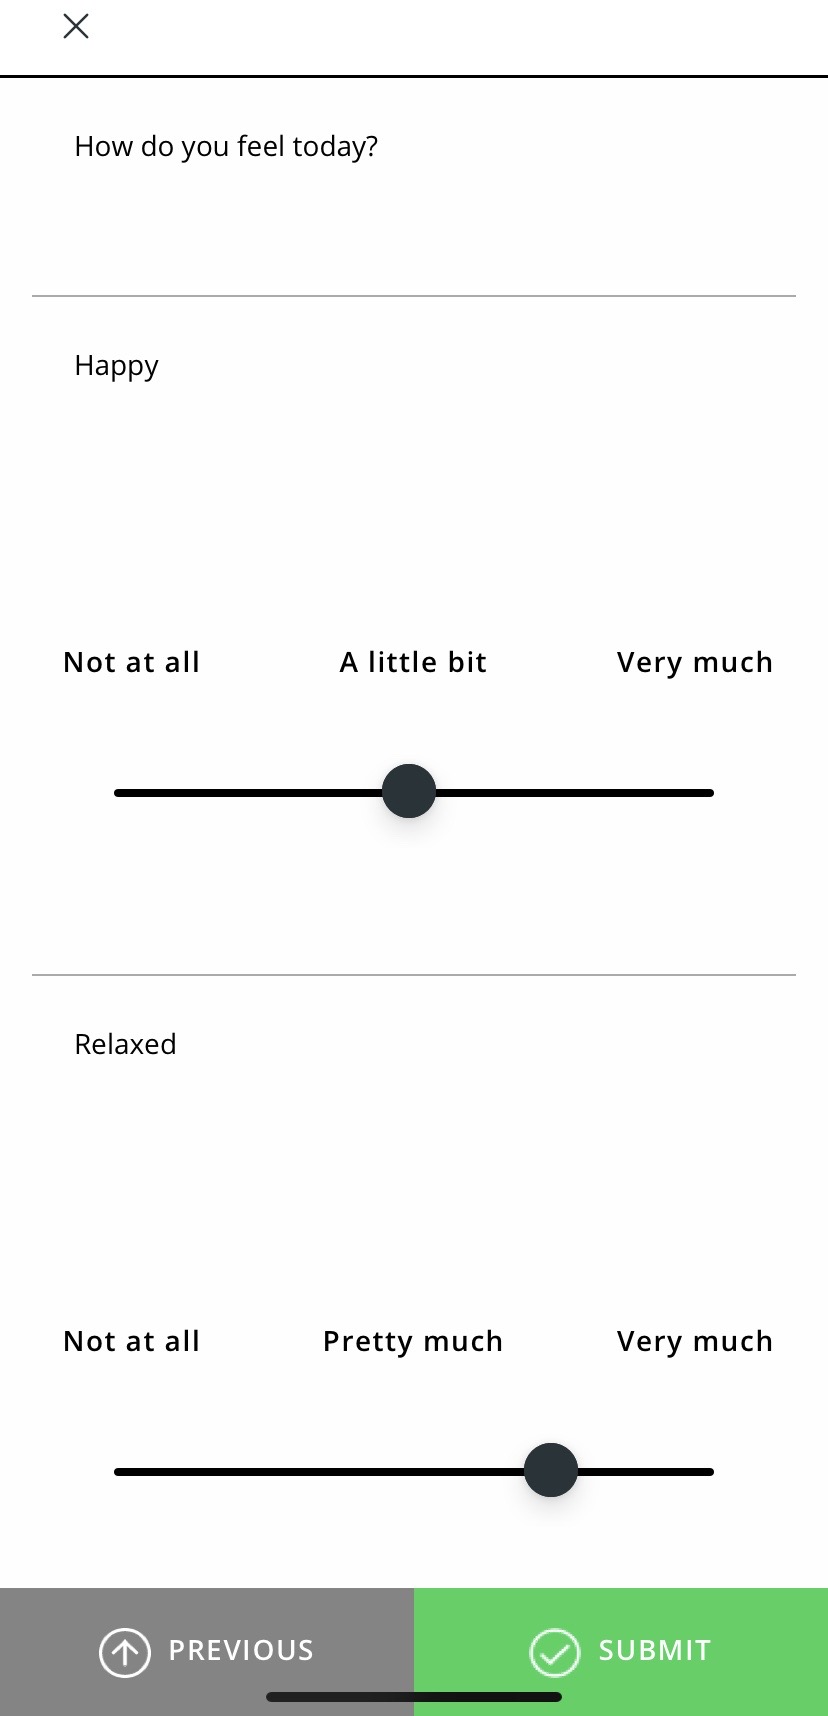
Alternative: Creating a Matrix-Like Layout with VAS
While the native Matrix Question type is the recommended approach for most Likert and grid-based questions with discrete choices, you can also create a visual simulation of a matrix using multiple Visual Analog Scale (VAS) questions.
This alternative is particularly useful when you want to present a grid of sliders instead of radio buttons, allowing for continuous or semi-continuous ratings across multiple items.
To achieve this, place multiple VAS questions in the same survey section. For a cohesive look, ensure the anchors or labels are consistent across all VAS questions. When combined with the Section Display Mode, all VAS questions will appear stacked on a single page, creating a matrix-like appearance.
[!note]
This approach only affects the visual layout. Each VAS item remains an individual question, and responses are still collected separately for each one. For standard grid questions with discrete choices, using the dedicated Matrix Question type is the preferred and more efficient method.