The first step to using Avicenna is creating a study. Studies form the core of Avicenna, and you cannot run or manage any research without them.
My Studies
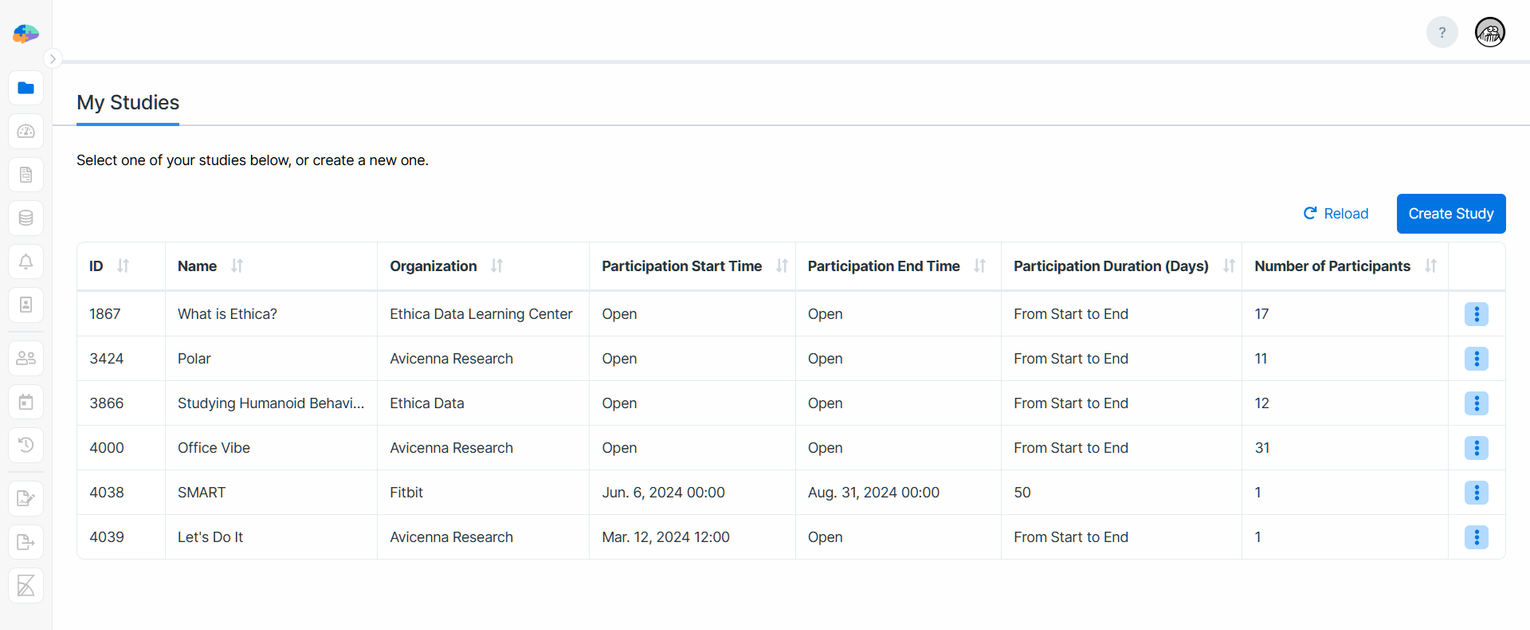
Avicenna lets you be part of multiple studies, either as a researcher or a study owner. You can see all your studies on the My Studies page in your dashboard.
On this page, you can open a study by clicking its row, create a new study, and perform other actions.
Create a New Study
To create a new study, follow these steps:
- Go to the My Studies page in your dashboard.
- Click the Create Study button.
- In the Create a New Study dialog, click Let’s Go to start.
- Fill in the study details for each step.
- Submit each step using the Checkmark button or the Enter key.
- Click Start to create your study. This sets up the database and redirects you to the Basics Page in your dashboard. As part of this, Avicenna assigns a unique ID to your study, helping you to distinguish it from other studies on the Avicenna platform.
[!note]
You can navigate back to completed steps by clicking their titles.
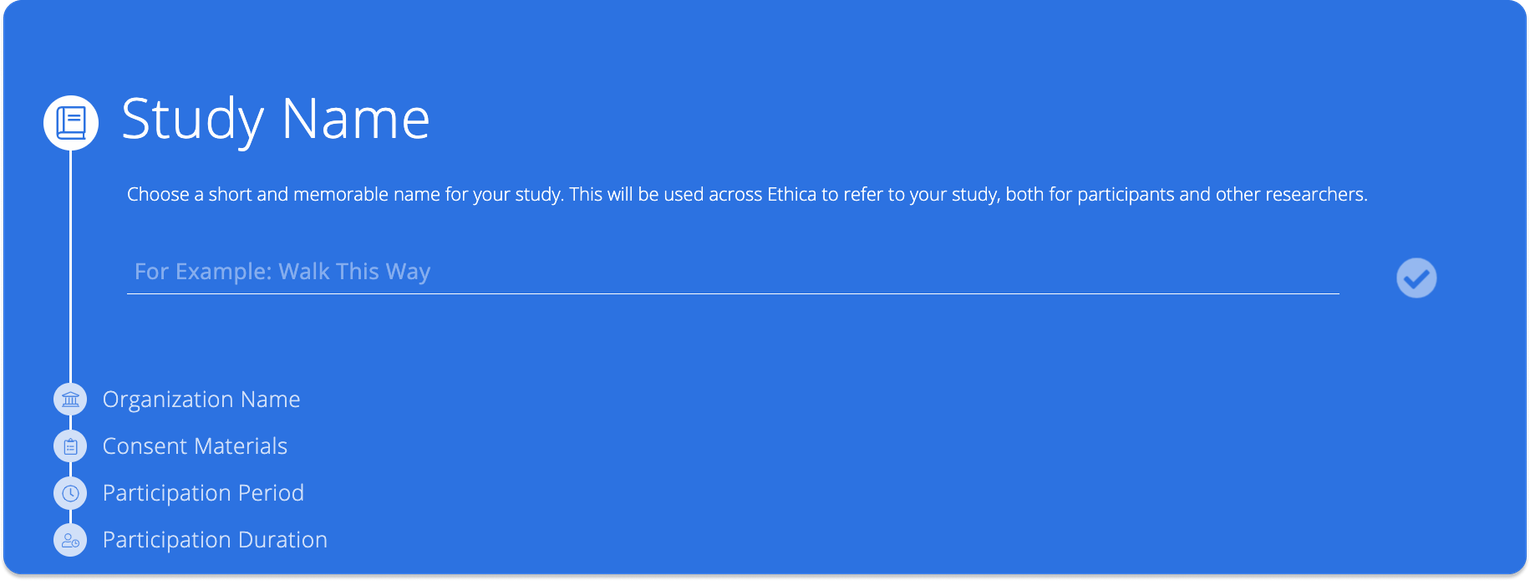
Study Details
Study Name
A concise and memorable name for easy reference in the researcher dashboard and participant apps.
Organization Name
The name of the organization conducting the study. It defaults to your affiliated institution but can be adjusted if needed.
Consent Materials
The participant consent form, usually approved by your institution’s review board (IRB). This content is shown to participants during registration before they join your study. Participants are expected to read and accept this content before joining the study. Make sure it includes:
- Study purpose
- Participant risks and benefits
- Data handling and access (how, who, etc.)
- Research team contact information, if needed
- Withdrawal procedures
If participants provide signed consent in person, the content here can be mostly informational. If no signed forms are collected in person, include the full consent text and clearly state that registering for the study implies consent.
You can format your content using the available controls at the top of the input area.
Participation Period & Duration
Defines when and how long the participation (e.g., data collection) will take using the start and end dates and times. For more details, visit Participation Period.
[!note]
Participation duration cannot exceed the participation period.
Duplicate a Study
Study owners can duplicate a study protocol/schema (not the participants or their data) instead of creating one from scratch.
To duplicate an existing study:
- Find the study you want to duplicate on the My Studies page.
- Click the three-dot menu next to it and select Duplicate.
- Confirm the action.
- You will receive an email notification once the duplication is complete or has failed for any reason.
Duplicated elements include:
- Basic settings
- Localizations and translations
- Sites
- Activities (the last version only)
- Data sources excluding beacons mapping
- Notification templates and their links to the activities
- Researchers, roles, and permissions
Also, all references to survey questions in criteria, question placeholders, and receiver questions will automatically update to reflect the new survey IDs in the duplicated study.
[!note]
Duplicated studies have a trial license. On the other hand, settings such as SMS and chat (televisit) are not copied. Contact support@avicennaresearch.com if you want to adjust those settings.
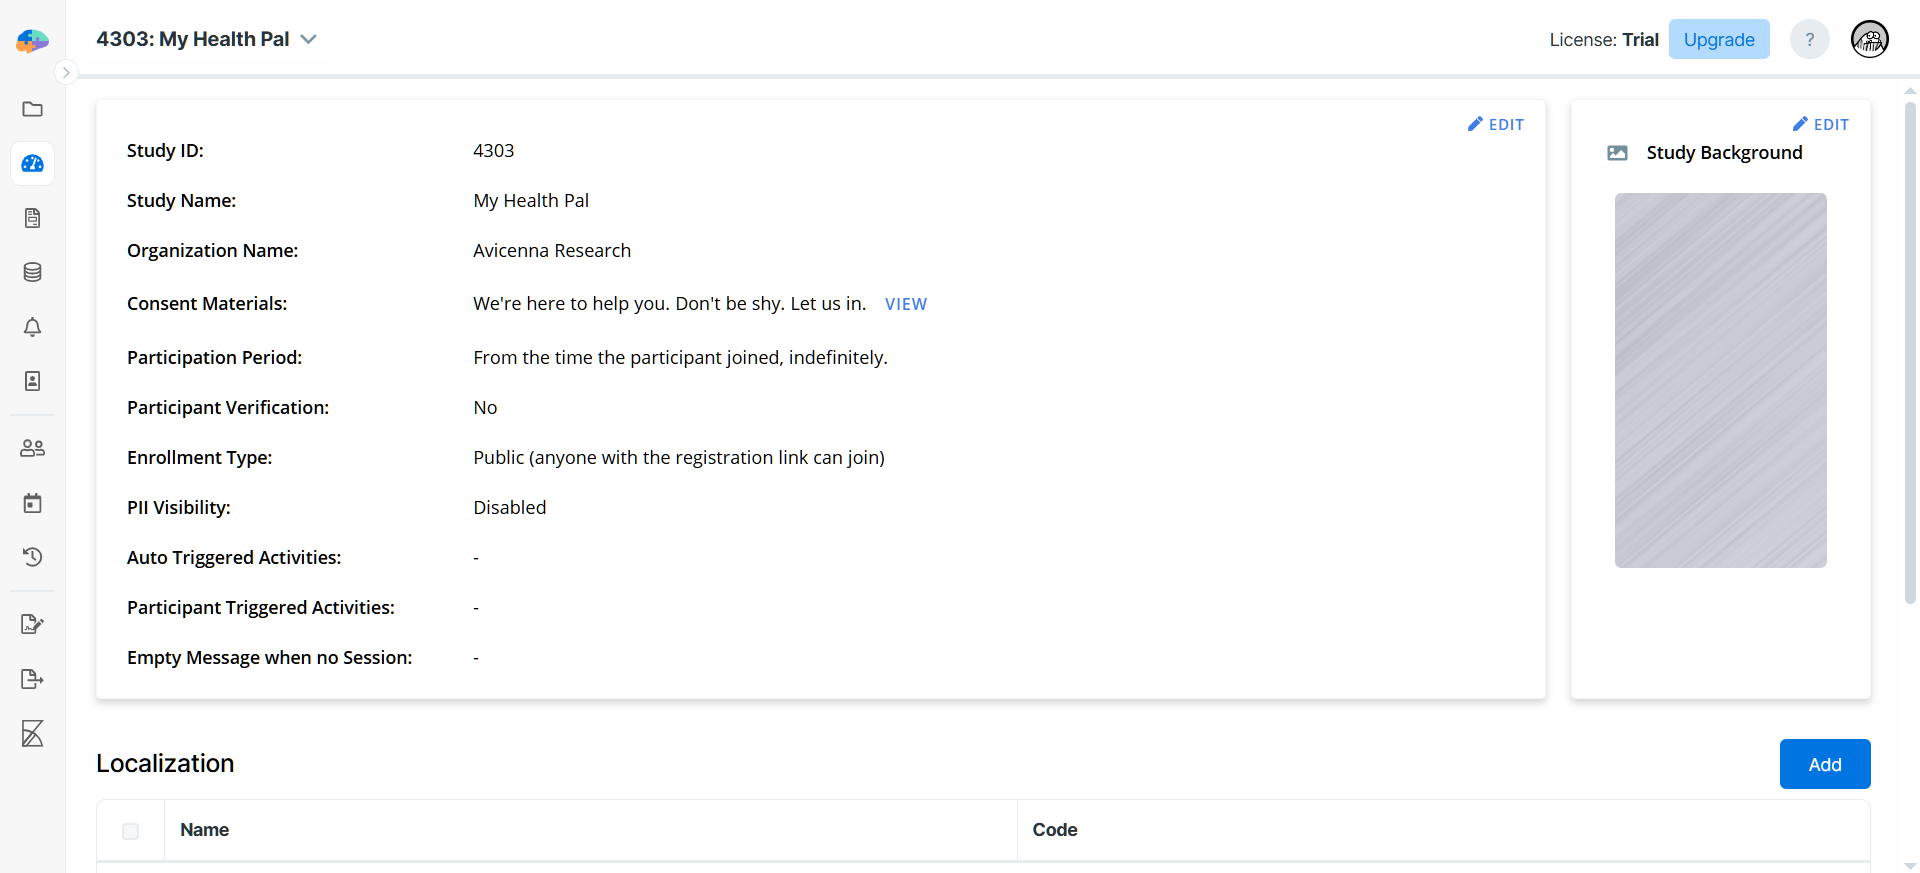
Basics Page
From the Basics page, you can view your study’s ID, name, organization, consent materials, participation timeline, and some other details.
On the other hand, this page allows you to make changes to the basic settings as needed.
Editing a Study
Once a study has been created, you can update its basic settings at any time by using the Edit buttons at the top of the Basics page.
Other than name, organization, consent materials, and participation timeline, you can also adjust the following settings:
Participant Verification
Decide whether Avicenna should verify each participant’s phone number and/or email address:
- Verify phone number: Required for sending SMS notifications. To enable this option, contact our support. Note that additional charges may apply.
- Verify email: Ensures participants provide a valid email address. Also, this is required for sending email notifications, but you can still enable this even if your study isn’t going to send any email notifications.
[!note]
The checkbox can be selected, but the feature may remain inactive until the required underlying service is enabled. The checkbox reflects the intended setting, but the feature only works when the corresponding service (SMS or email notifications) is enabled by support or correctly configured.
Enrollment Type
Specify how participants can join your study. For more details, visit Enrollment Types.
Auto-Triggered Activities
Provide a title for auto-triggered activities. Participants will see this title on the study’s home page of their app.
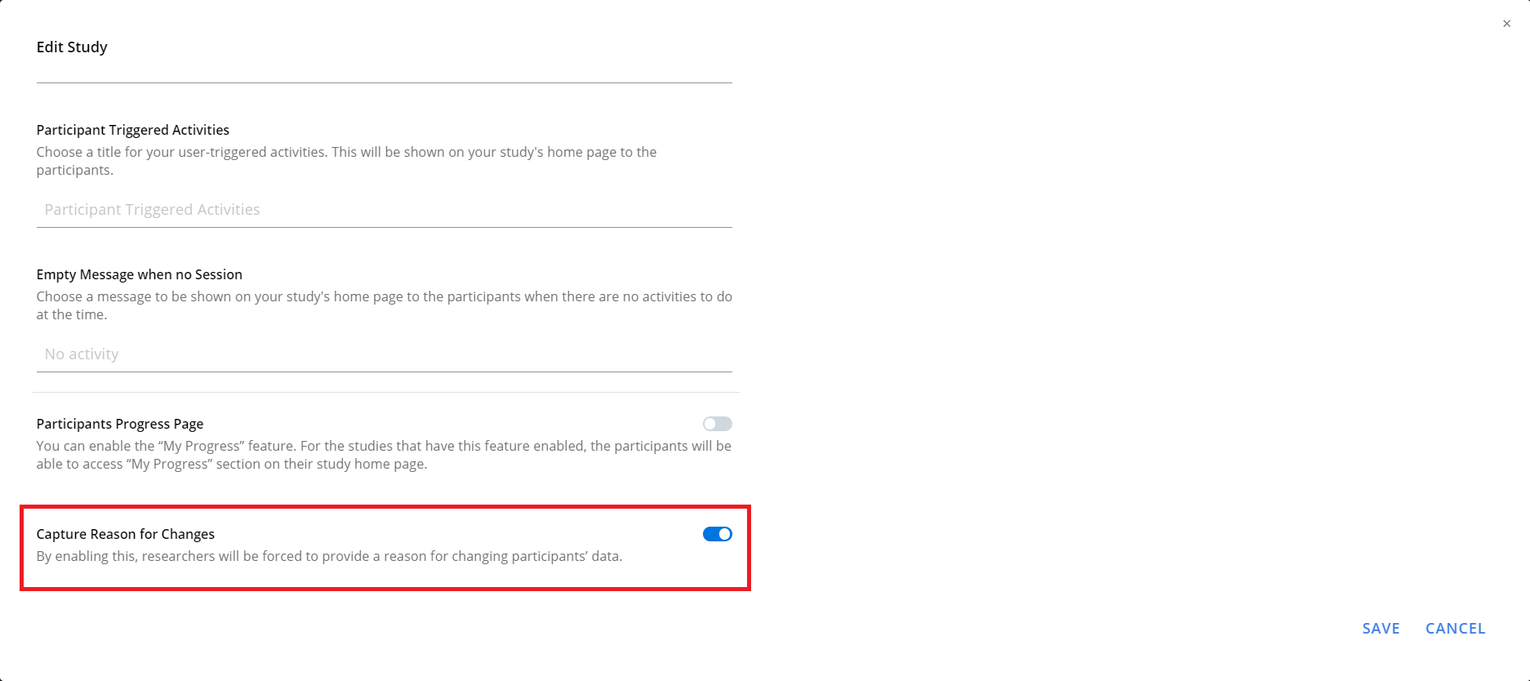
Participant-Triggered Activities
Provide a title for user-triggered activities. This title will appear on the study’s home page of the participant’s app.
Empty Message (No Session)
Create a message that appears on the study’s home page of the participant’s app when no activities are currently available.
Participants Progress Page
Enable the My Progress feature to let participants view their progress directly from the study’s home page of their app. See here for more details.
Capture Reason for Changes
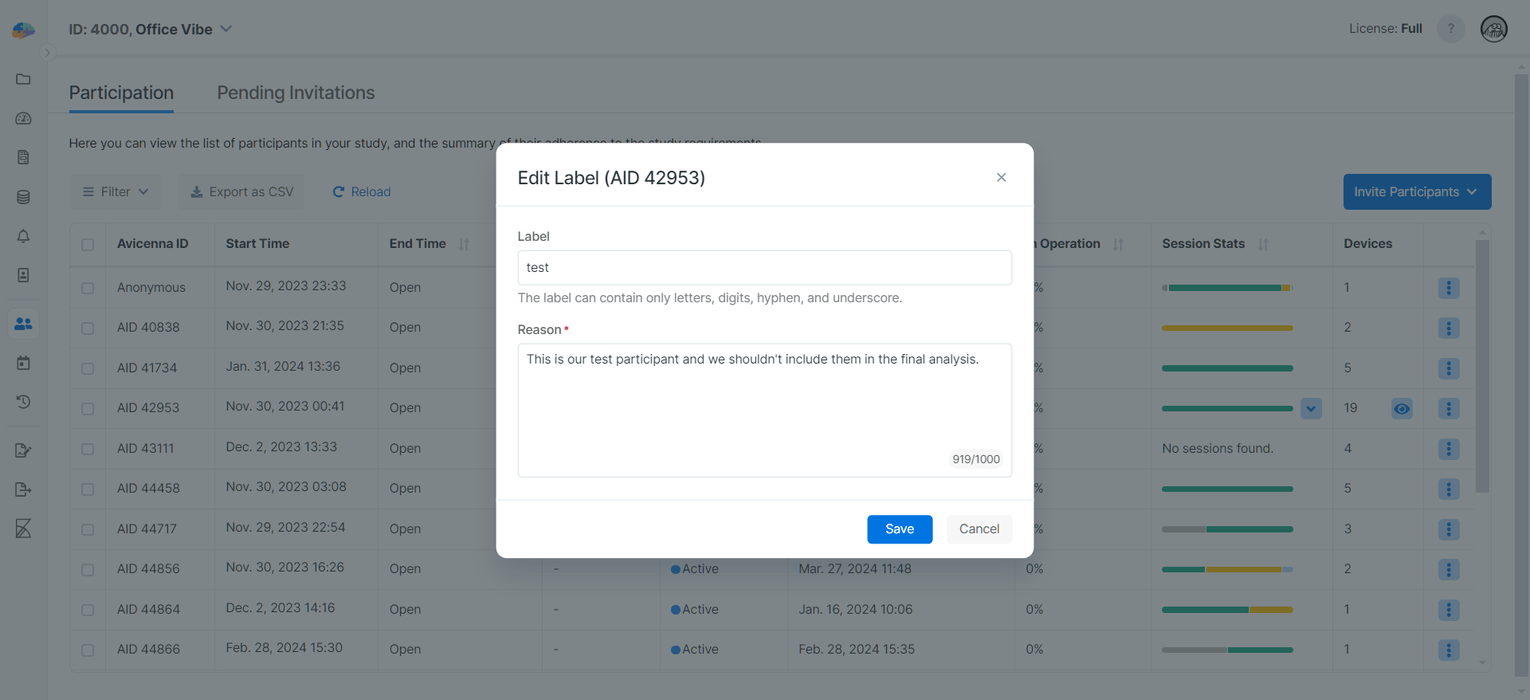
Researchers can enable a feature that will force them to provide reasons for any changes that affect participants’ data, including modifying the participation period, changing labels or sites, dropping them from the study, editing survey responses, etc. This provides transparency and accountability, empowering researchers to validate the integrity of any modifications.
Once enabled, researchers must provide reasons for changes made to participants’ data. For example, the following image shows that editing a participant’s label requires a Reason now:
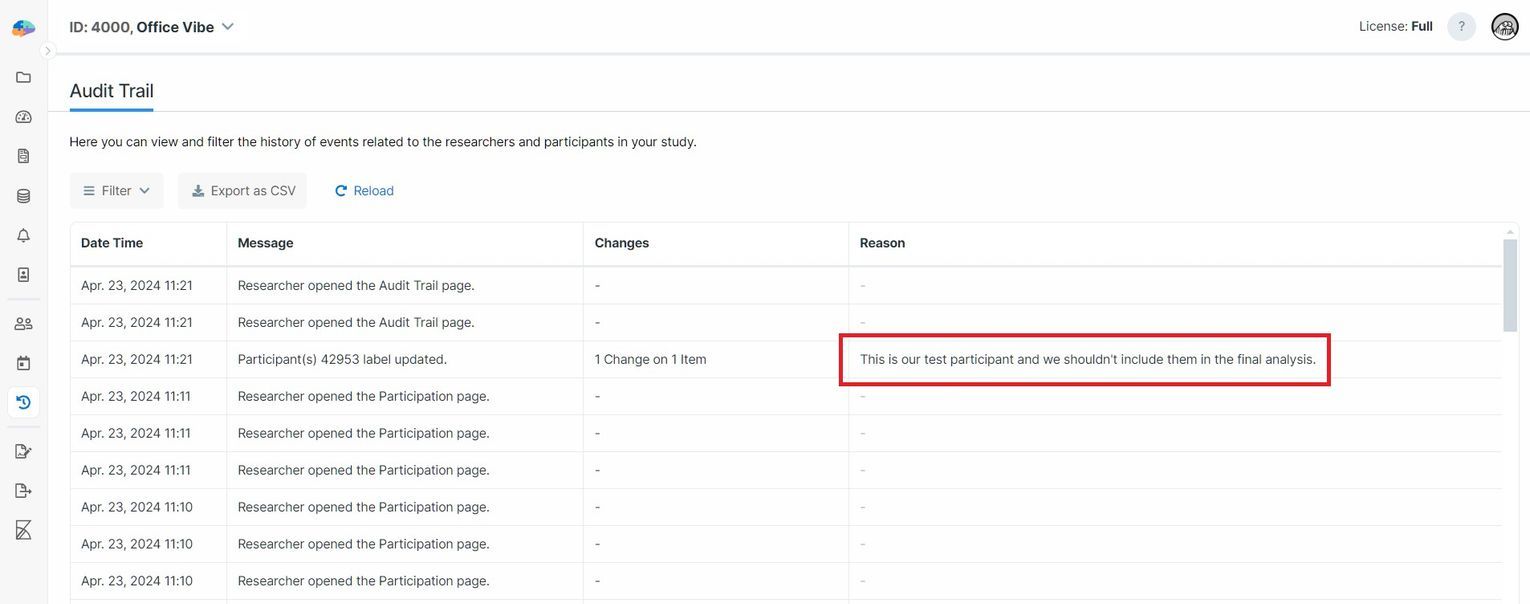
Reasons are recorded as part of the audit logs along with the changes made to the participants’ data. See the following image for the recorded Reason we wrote when changing the participant’s label:
PII Visibility
By default, Avicenna does not show participants’ PII to researchers. Avicenna allocates a unique ID to each new participant and uses this identifier to store their data in the database. This ID is used throughout the platform to reference participant data, ensuring personal details like names and email addresses are stored separately from study-related data and remain inaccessible. However, study owners can choose to display participants’ personal information for all researchers of the study.
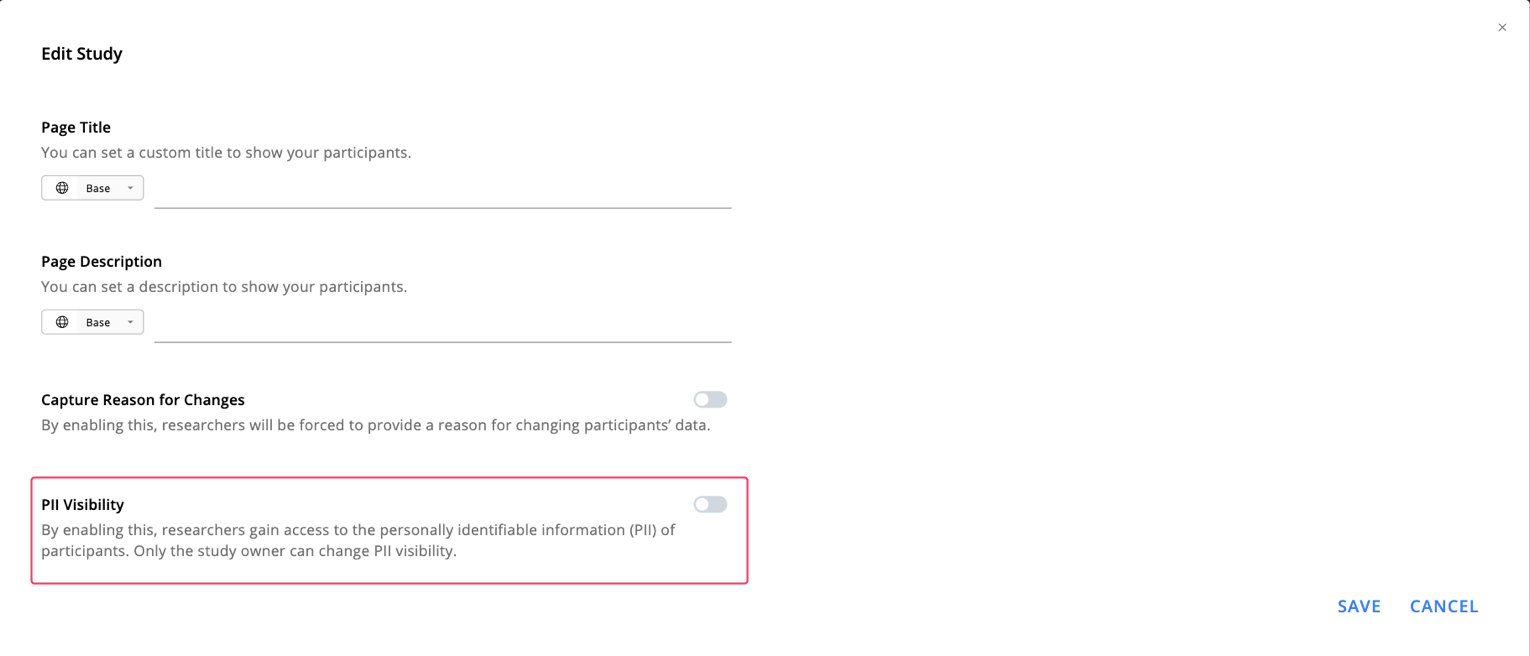
Once enabled, you can see some of the participants’ PII on the Participation page or the corresponding exports. This includes the participant’s first name, last name, and email address.
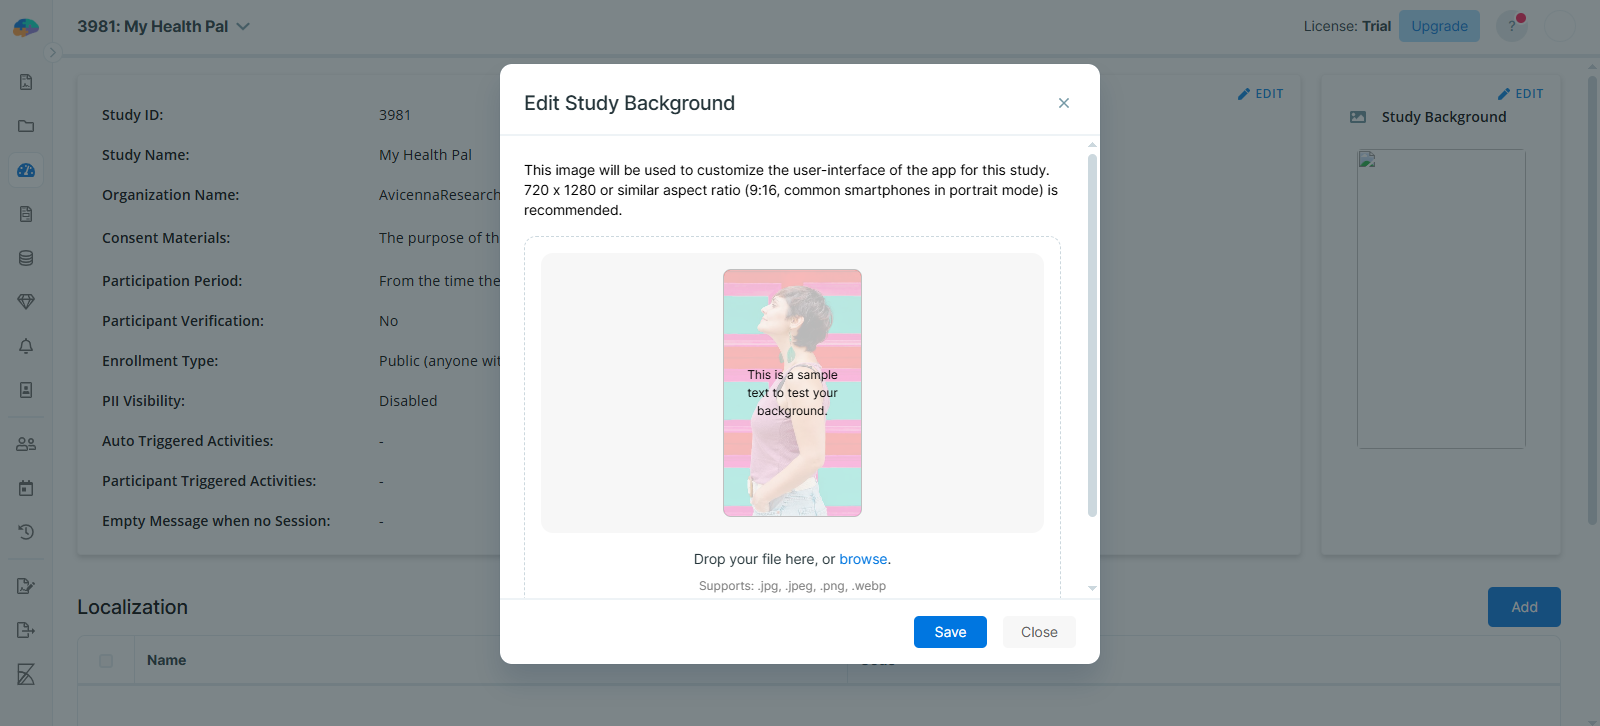
Study Background
You can customize the look of your study on the participant apps using an image. The ideal aspect ratio is 9:16 (e.g., 720 x 1280). The chosen image will appear as the background of your study’s home page, consent page, and registration page.