Appointments lets you offer bookable sessions, such as screening calls, interviews, and check-ins, to your study participants. You can define your availability, configure the session types participants can book, and share booking links that let participants reserve a time slot.
You can also book appointments on behalf of participants, view scheduled appointments on a calendar, and cancel appointments when plans change.
Setting up Appointments requires four steps, in this order:
- Set researcher availability
- Create appointment types
- Set up appointment notifications
- Share the booking link with participants
Set Researcher Availability
Availability belongs to you, not to a study. You set it once, and it applies to every study where you are a researcher.
To set your availability:
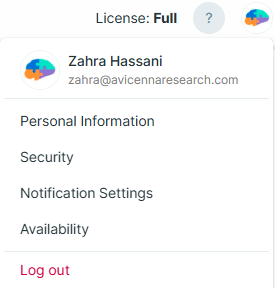
- Open the profile icon in the top-right corner of the Researcher Dashboard.
- Select Availability.
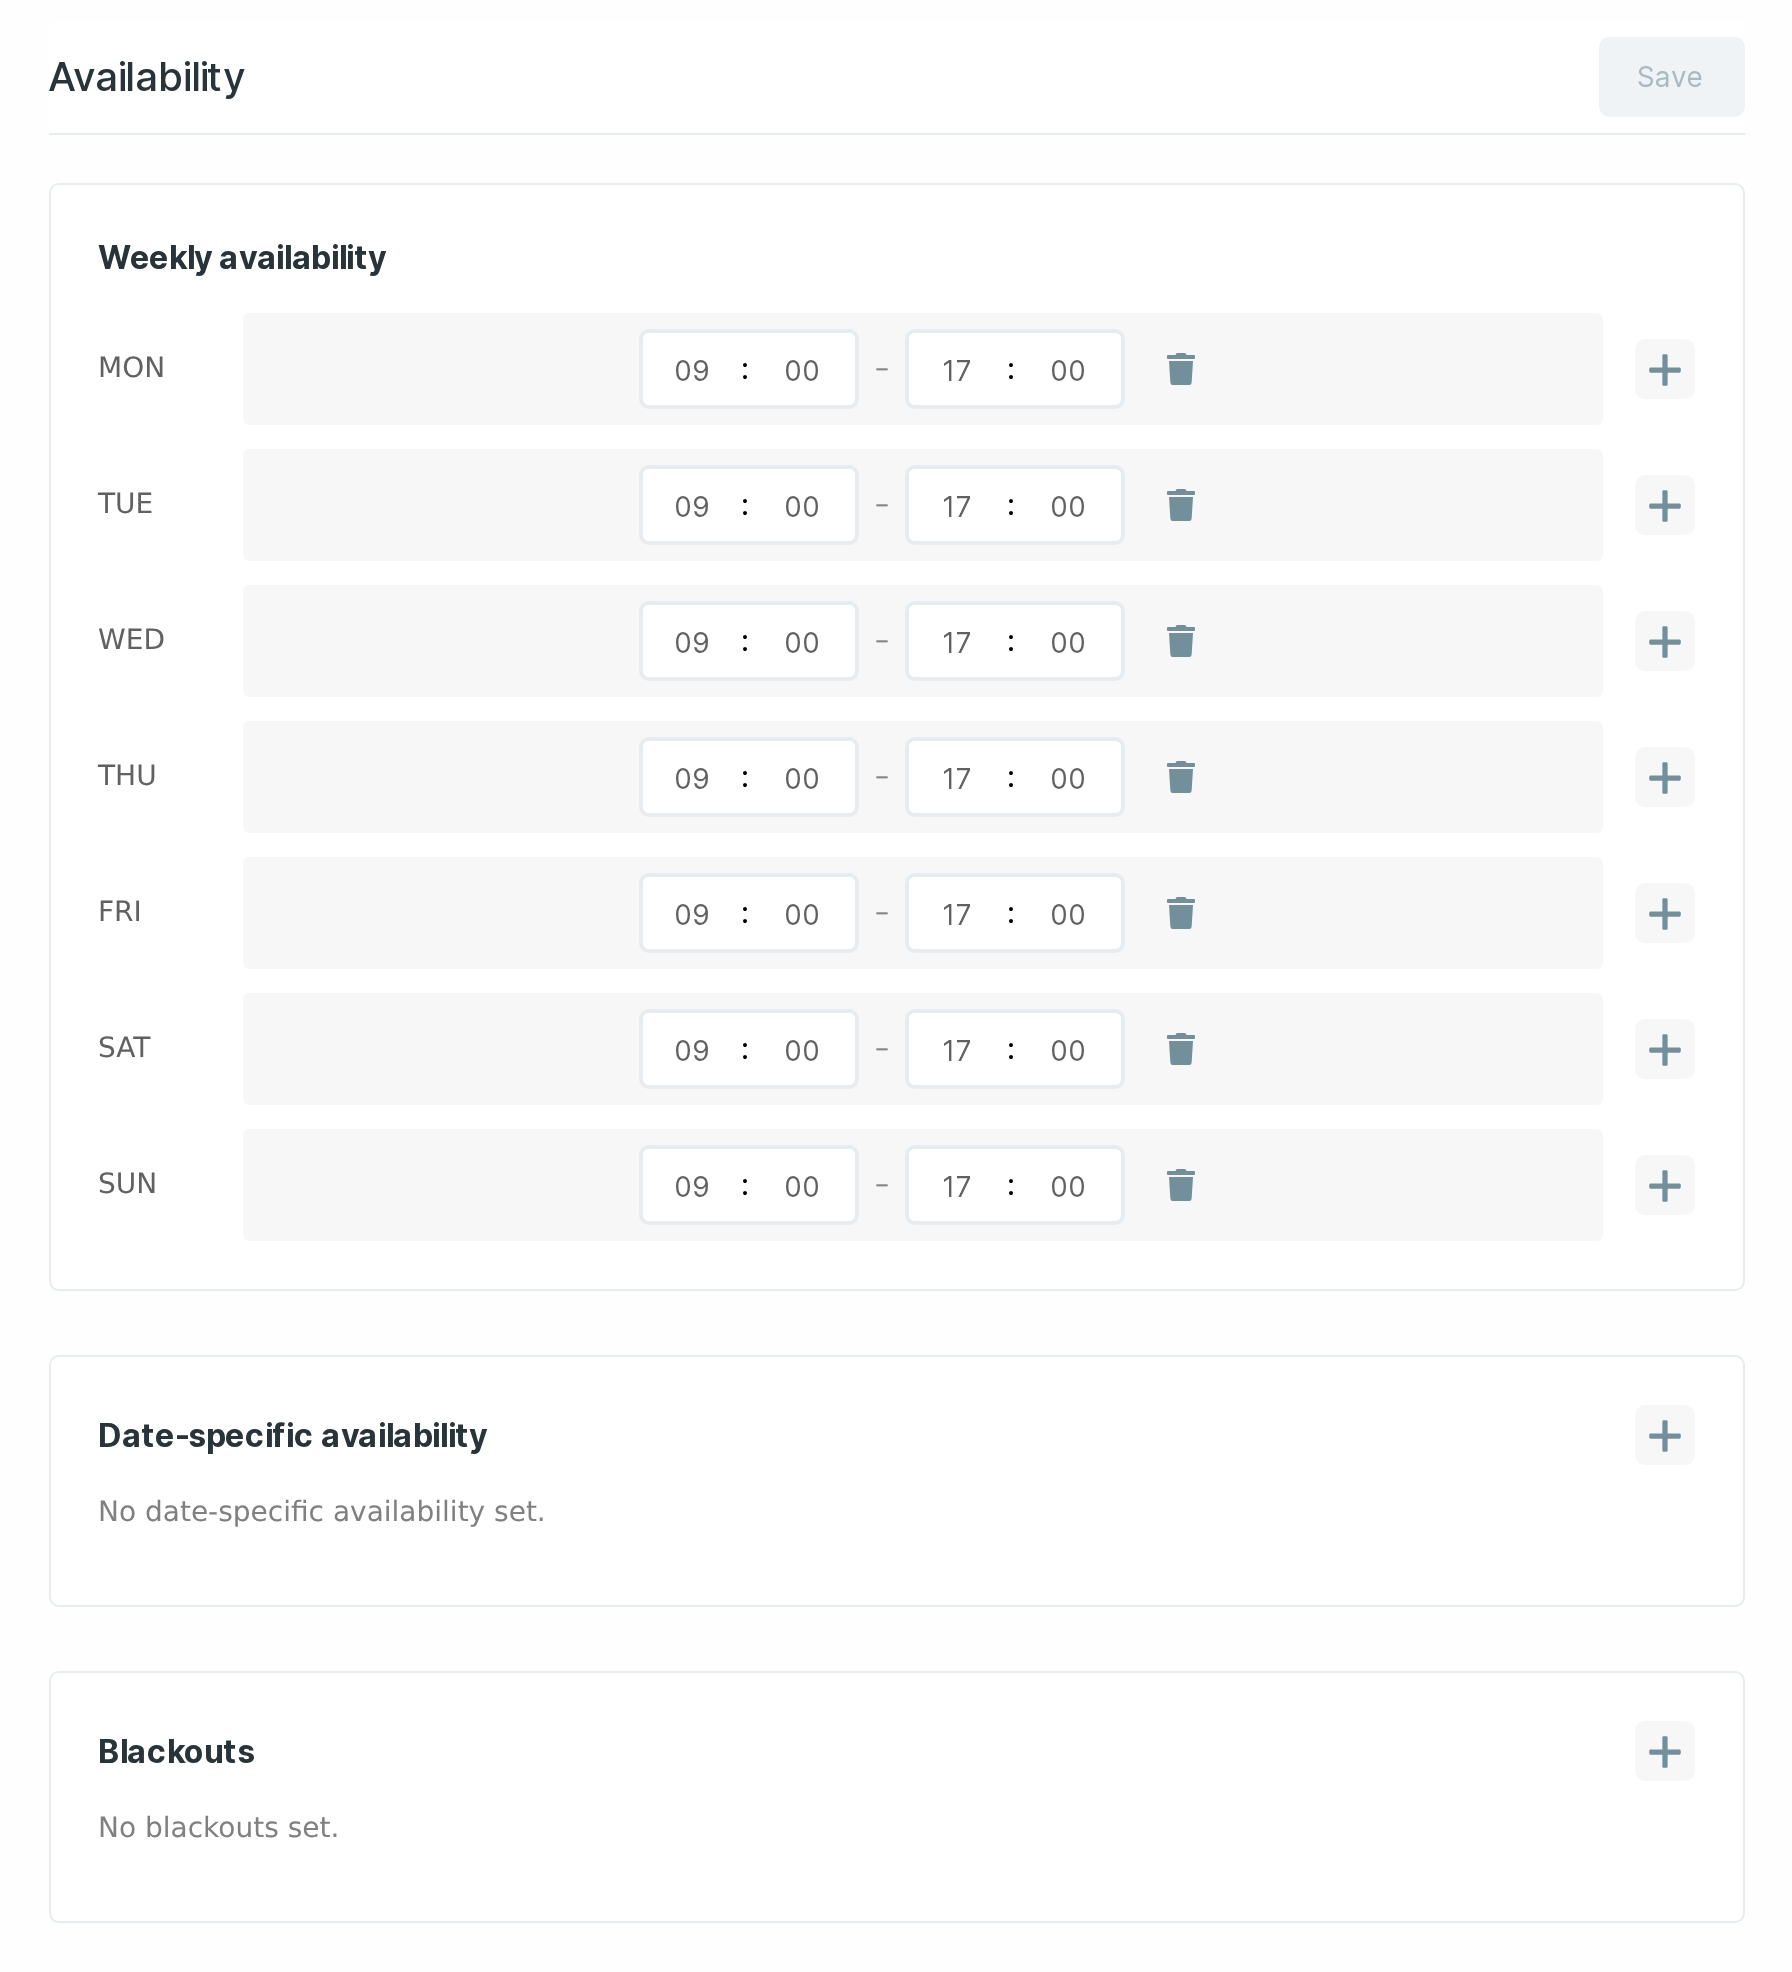
You can configure three types of availability:
- Weekly availability
- Date-specific availability
- Blackouts
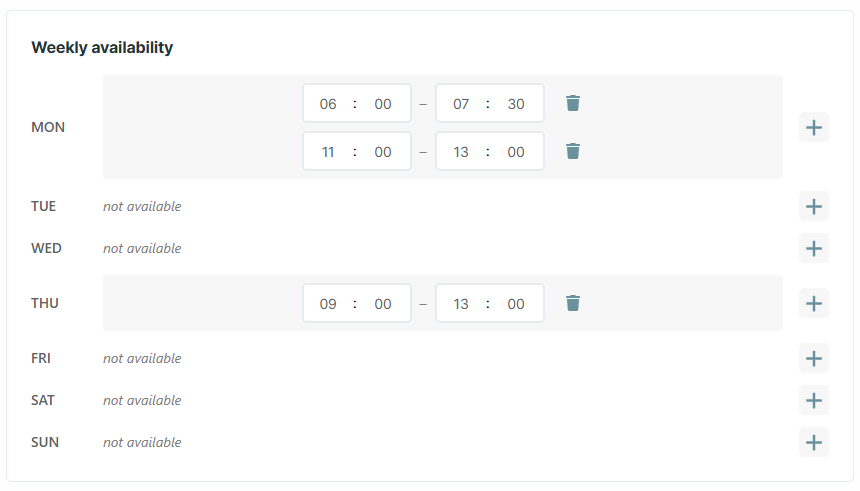
Weekly availability
Weekly availability repeats on the same weekday every week.
For each day, define one or more availability periods by specifying a start time and an end time. Use the plus (+) button to add another period to a day.
Example:
- Monday:
06:00–07:30 - Monday:
11:00–13:00
This configuration makes you available for bookings during both time ranges every Monday.
Date-Specific Availability
Date-specific availability defines availability for a specific calendar date.
Use it for one-time sessions or for dates when your regular weekly availability does not apply.

Blackouts
Blackouts define periods when you are unavailable.
The All day toggle is enabled by default, which blocks the entire date. To block only part of a day, disable the toggle and specify the start and end times.


[!note]
Blackouts always take precedence over availability. If a blackout overlaps with an availability period, you are considered unavailable during the overlapping time.
Create an Appointment Type
An appointment type defines one kind of bookable session. It belongs to a single study, and you can create as many appointment types as you need from the Appointment Types page.
To create an appointment type:
- Open the Appointment Types page from the Researcher Dashboard.
- Click Create Appointment Type.
- Complete the fields described below.
- Click Save.
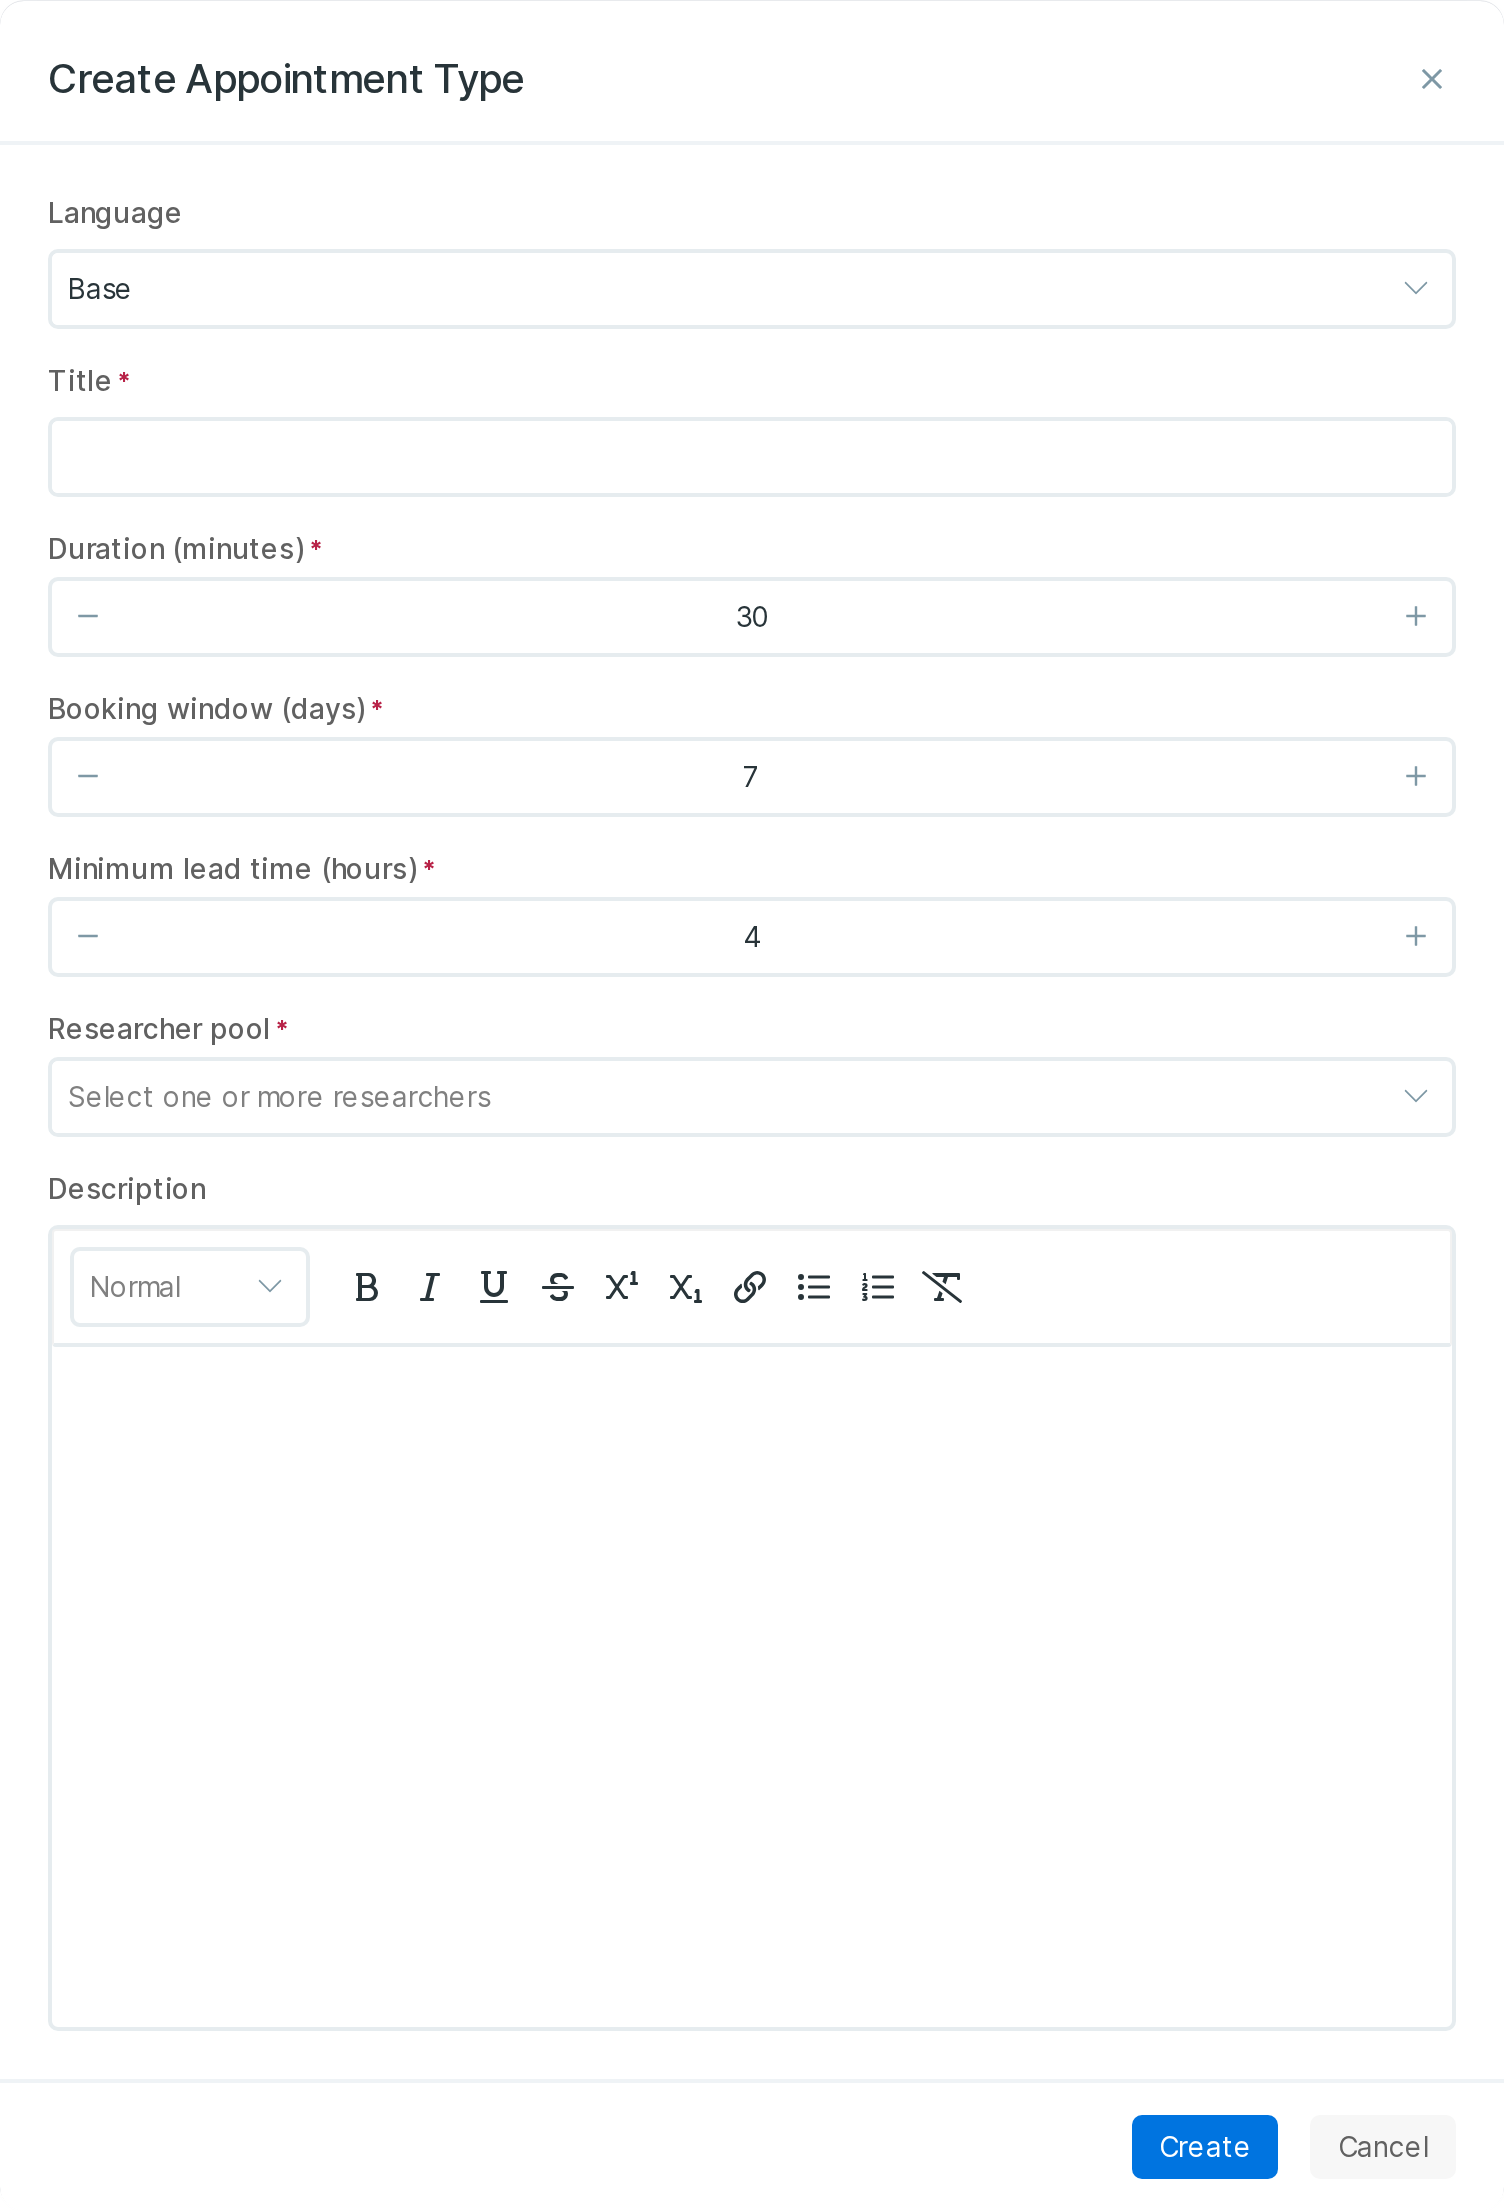
Provide the following fields when creating an appointment type:
- Title: The name of the appointment type shown to participants.
- Duration: The length of the appointment.
- Booking Window: How far into the future participants can book appointments.
- Minimum Lead Time: The minimum notice required before an appointment can start. Participants cannot book appointments that begin sooner than this limit.
- Researcher Pool: Researchers eligible to host this appointment type. Select one or more researchers who already have access to the study. Participants can be booked with any available researcher in the selected pool.
- Description: Optional information displayed to participants. Add any session details here, including video links, dial-in details, room numbers, or other instructions.
[!note] Multi-Language Studies
If your study includes localizations, you can provide translations for the Title and Description fields.
After an appointment type is created, you can view it on the Appointment Types page and edit or delete it when needed.
Set Up Notifications
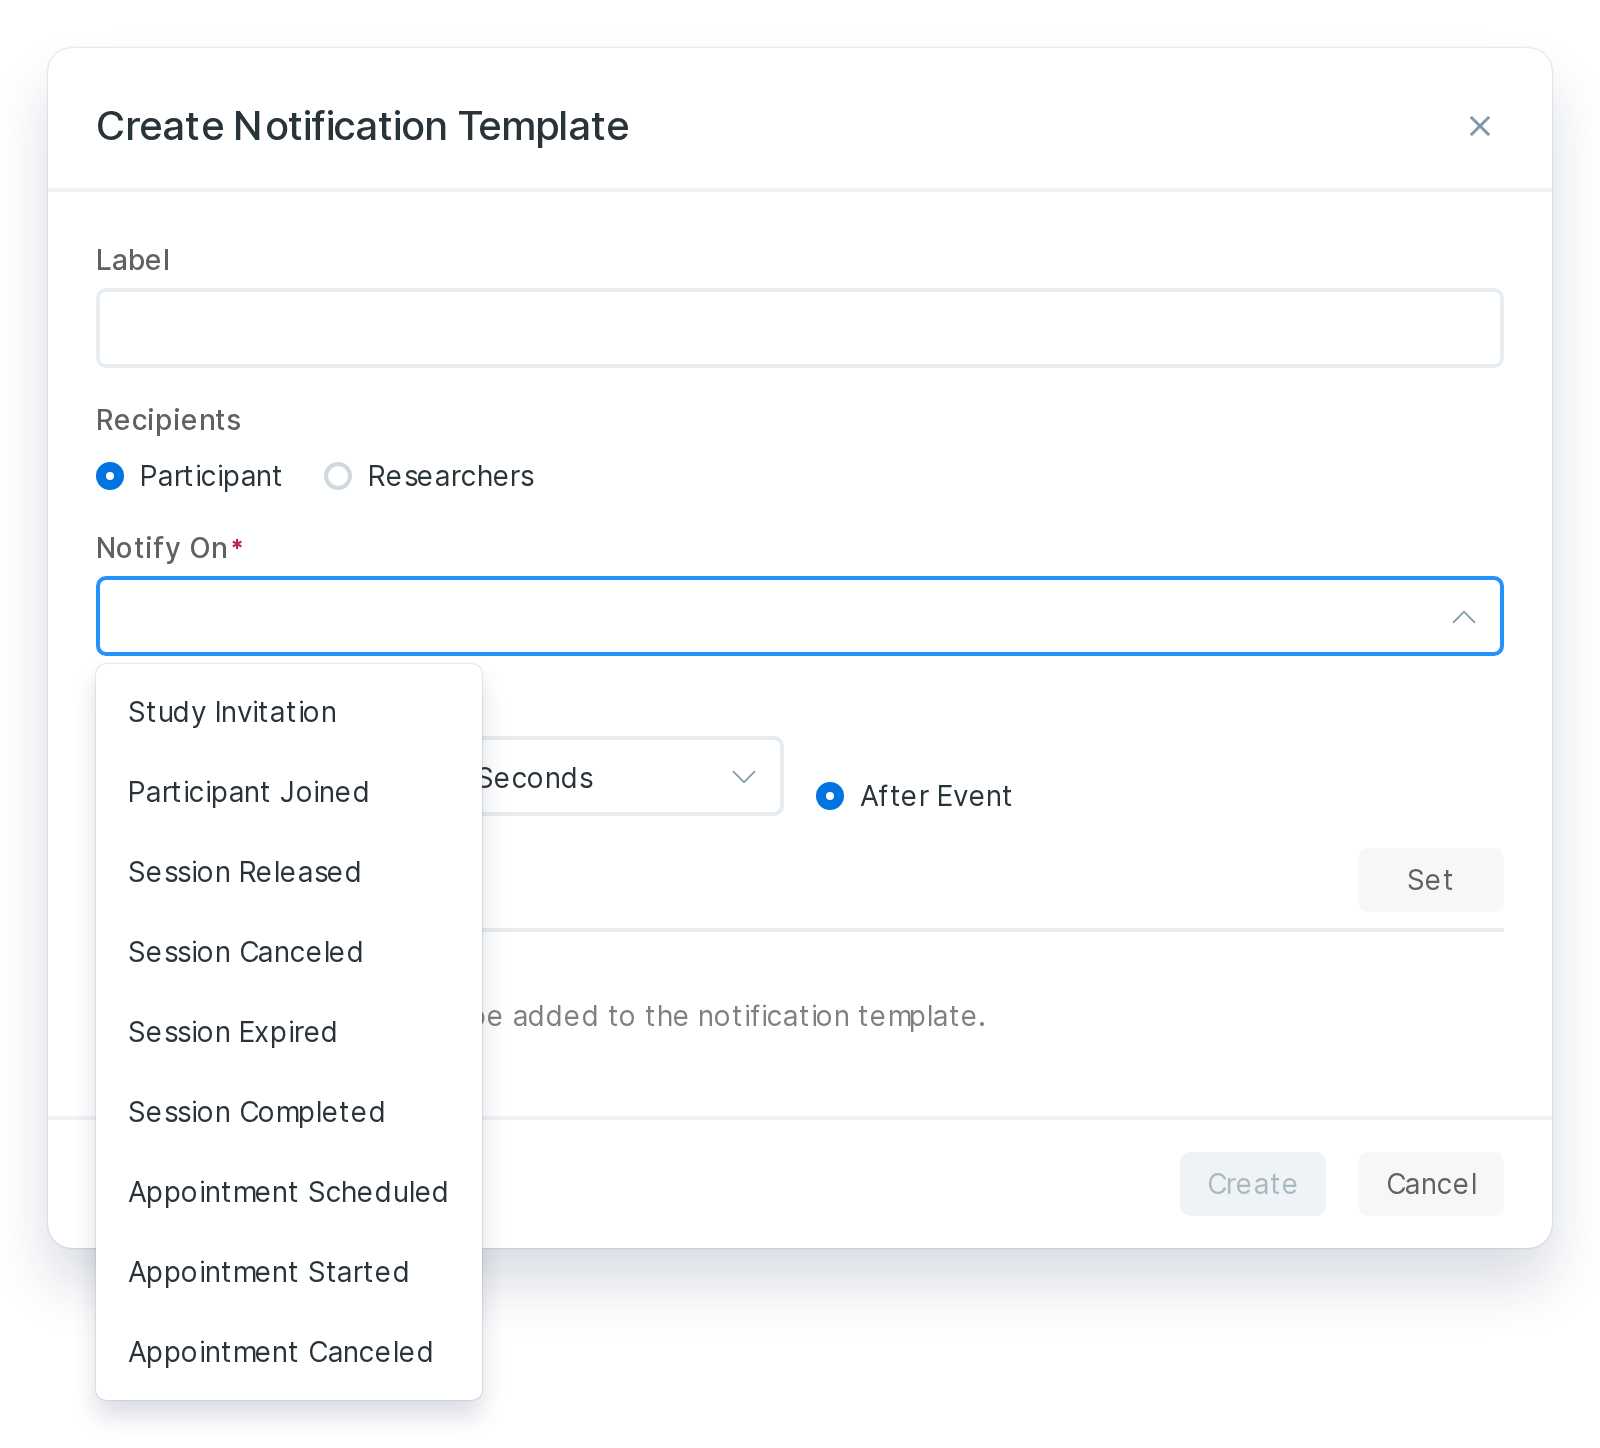
Creating an appointment does not automatically notify participants or researchers. If you share a booking link without configuring notifications, participants can still book appointments, but they will only see the confirmation message displayed on the booking page. To notify participants or researchers about appointment activity, create notification templates for the events you want to support.
Appointments support notifications for three events. Each event can be delivered by email, SMS, or in-app notification.
| Event | Trigger |
|---|---|
| Appointment Scheduled | Sent when an appointment is booked. |
| Appointment Started | Sent at the appointment start time. Configure a negative offset to send it as a reminder before the appointment begins. |
| Appointment Canceled | Sent when a researcher cancels an appointment. |
Share the Booking Link
Each appointment type has a unique booking URL. You can copy the URL from the Appointment Types page and share it with participants.
https://avicennaresearch.com/app/dashboard/pdash/study/{study_id}/appointment-types/{appointment_type_id}
To prevent participants from booking before a specific date and time, add the min_date_time parameter to the URL. This is useful when an appointment should only become available after another study milestone.
Example:
?min_date_time=2026-08-01 09:00
The min_date_time value is interpreted using the participant’s timezone.
Accepted formats:
yyyy-MM-dd HH:mm
yyyy-MM-dd HH:mm:ss
[!note]
Participants must be signed in before accessing the booking page.
When a participant confirms an appointment:
- An available researcher from the pool is assigned at random.
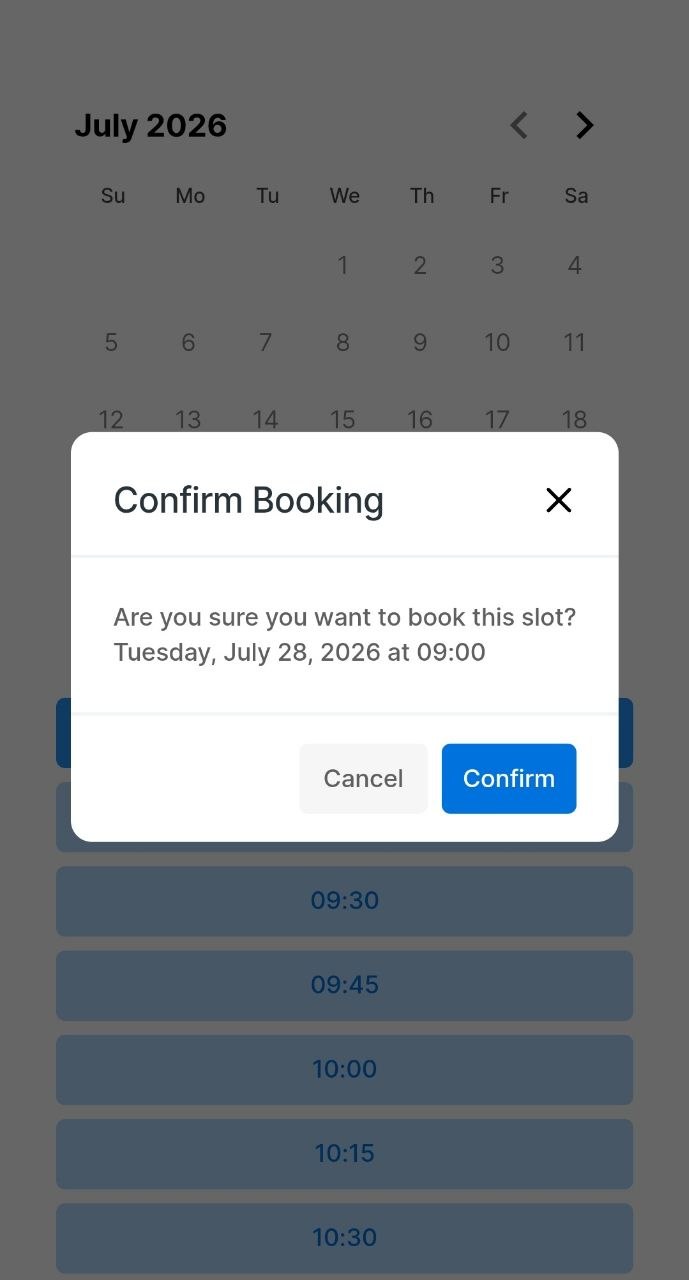
- The participant sees a confirmation message.
- The appointment appears on the assigned researcher’s Appointments page.
If the selected slot becomes unavailable before confirmation, for example, because another participant booked it or a researcher changed their availability, the booking fails. The calendar refreshes and displays the remaining available slots.
Managing Booked Appointments
The Appointments page displays your study’s bookings in a calendar with the following views:
- Daily
- Weekly
- Monthly
- Yearly
Each appointment entry displays:
- Appointment type.
- Participant.
- Start and end times.
- Participant timezone as a
GMT + offsetvalue.
Canceling and Rescheduling
Researchers can cancel appointments, but participants cannot cancel or reschedule their own appointments.
You can cancel your own upcoming appointments one at a time. After confirming the cancellation:
- The appointment is removed.
- The time slot becomes available for future bookings.
There is no separate rescheduling option. To move an appointment to a different time, cancel the existing appointment and create a new one.
[!note]
A researcher who is hosting upcoming appointments cannot be removed from the study until those appointments are canceled.
Reason for Changes
If your study has Reason for Changes enabled, you must provide a reason when booking or canceling an appointment.
For canceled appointments, the provided reason is included in the Appointment Canceled notification sent to participants. Write the reason as a participant-facing message rather than an internal note.
Timezone Behavior
Appointments use different timezone rules depending on where the information is displayed.
| Setting | Behavior |
|---|---|
| Availability | Stored using the timezone active when the availability entry was created. Existing availability does not shift if your timezone changes later. |
| Researcher calendar | Displayed using your current timezone. |
| Participant booking page | Displayed using the participant’s timezone. |
| Booked appointments | The scheduled time remains fixed after booking and does not change if the researcher or participant changes timezone settings later. |
Example:
A Monday availability period of 09:00–17:00 created in the America/Toronto timezone remains Monday 09:00–17:00 in that timezone.
If you later change your timezone to America/Vancouver, the availability does not shift to 06:00–14:00.
Book an Appointment
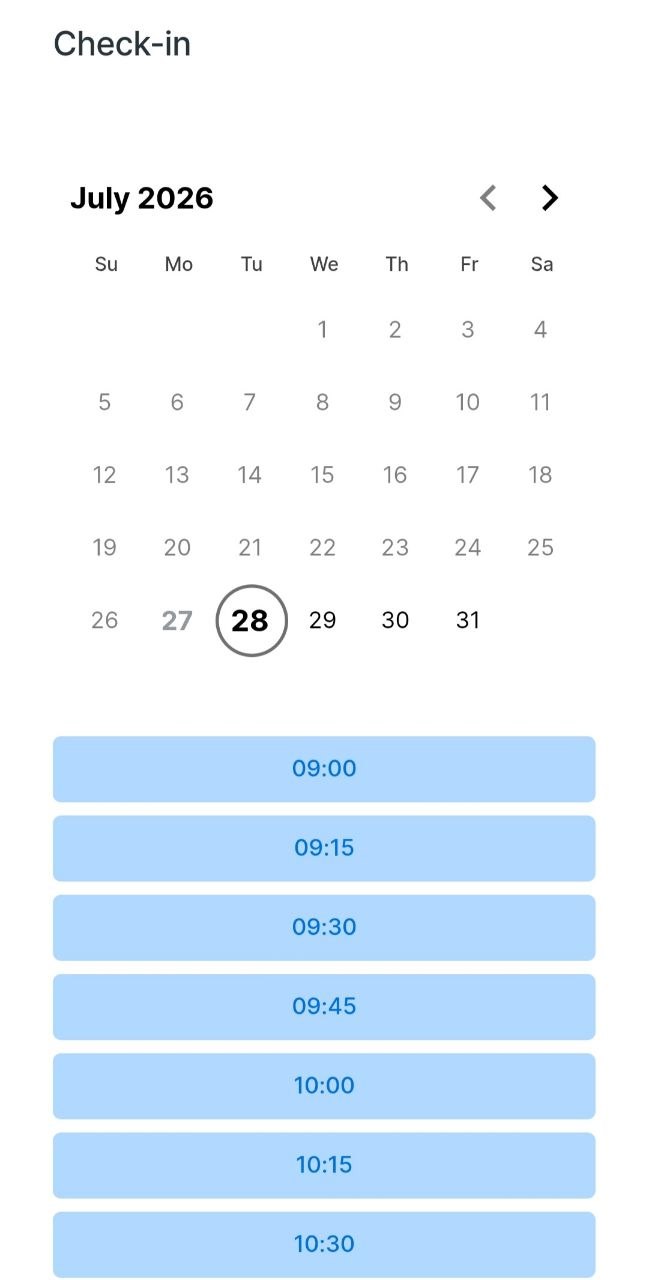
Participants book an appointment from a booking link. The booking page opens outside the usual study navigation and shows one appointment type at a time.
To book an appointment:
- Open the booking link.
- Pick a day. Days with no available times are grayed out and cannot be selected.
- Pick a time and confirm.
[!note]
- Times are local. Appointment times are shown in the participant’s device time zone, not the study’s.
- Participants cannot cancel or reschedule appointments. If they need to change or cancel an appointment, they must contact the study team.